I'll be honest, nails aren't my usual patch — I'm the one who does your hair while you tell me your gel appointment ran over. But enough readers asked me to test this pearly, glass-look almond set that I finally cleared the chair room table, plugged in a little SUNmini lamp, and had a go myself. It's every bit as satisfying as it looks on your feed, and nowhere near as fiddly as I expected once you know the order to do things in.
Starting clean: cuticles pushed back properly
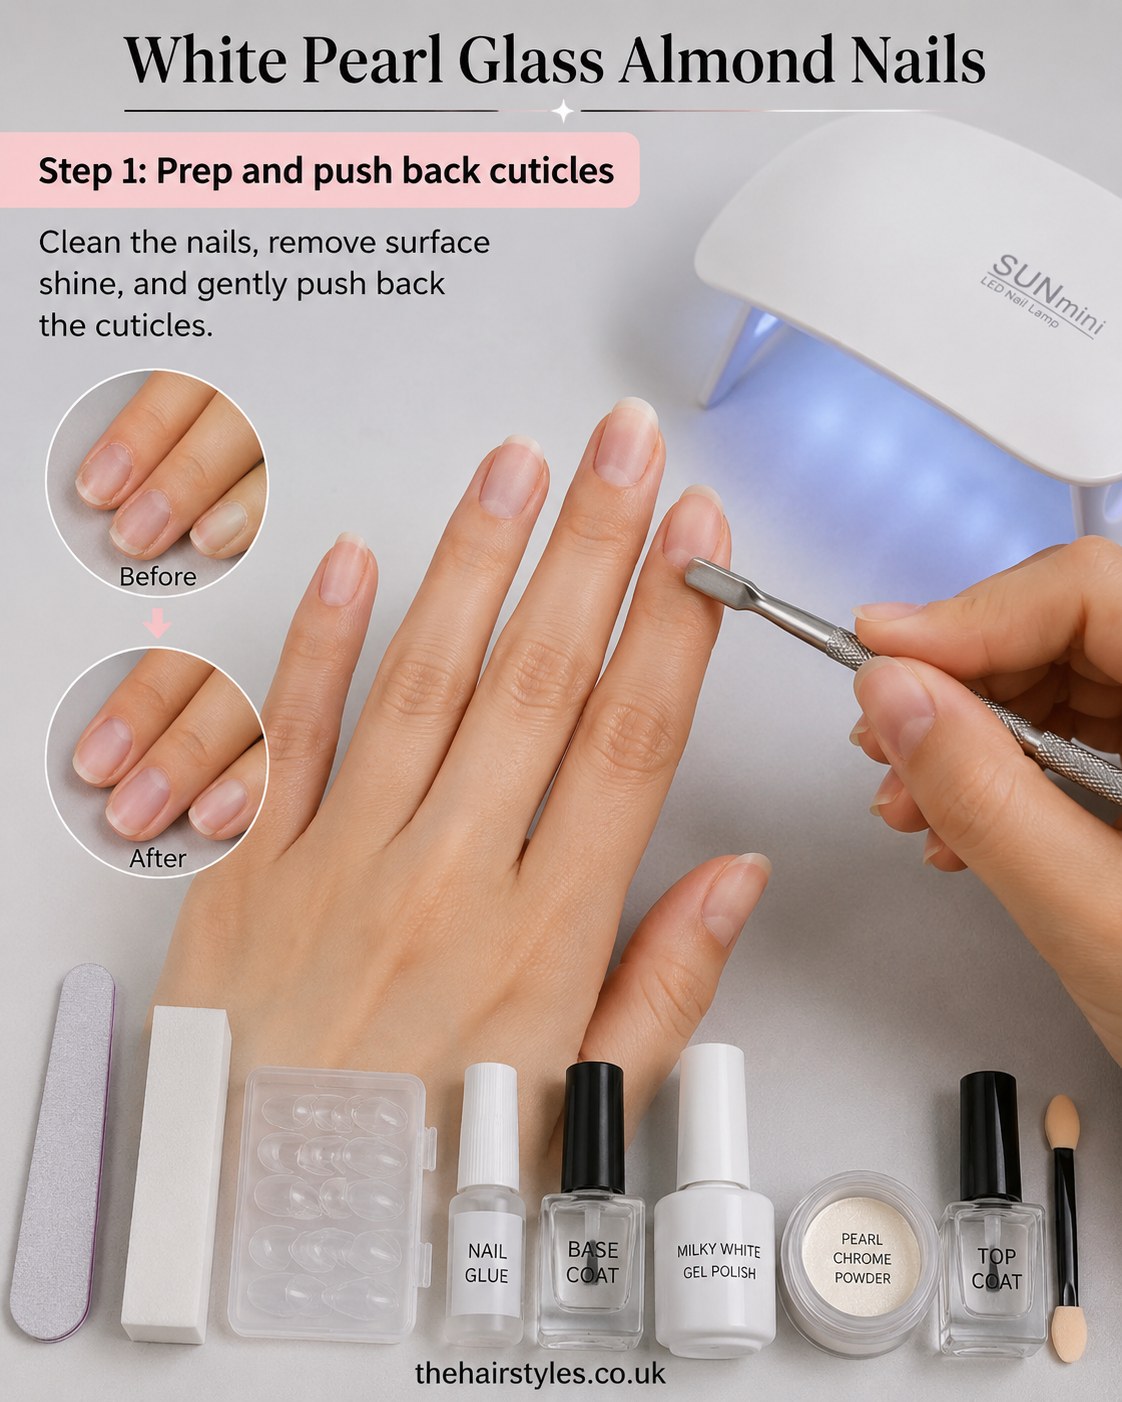
Every good set, hair or nails, starts the same way — with proper prep, not shortcuts. Clean nails and tidy cuticles are what make everything else sit right, so I filed away any surface shine with a buffer block and gently pushed each cuticle back rather than cutting into it.
You can see the before-and-after circles doing the honest work here: the before looks a bit dry and ridged, nothing dramatic, just real nails. The after is smooth and matte, ready to take glue without any oily patches lifting the tip early. I had the SUNmini lamp warmed up and waiting on the side — it's a small unit, but plenty bright enough for a home set.
A session manicurist once told me the whole set lives or dies on this ten-minute bit nobody photographs. She wasn't wrong.
Gluing on the clear almond tips
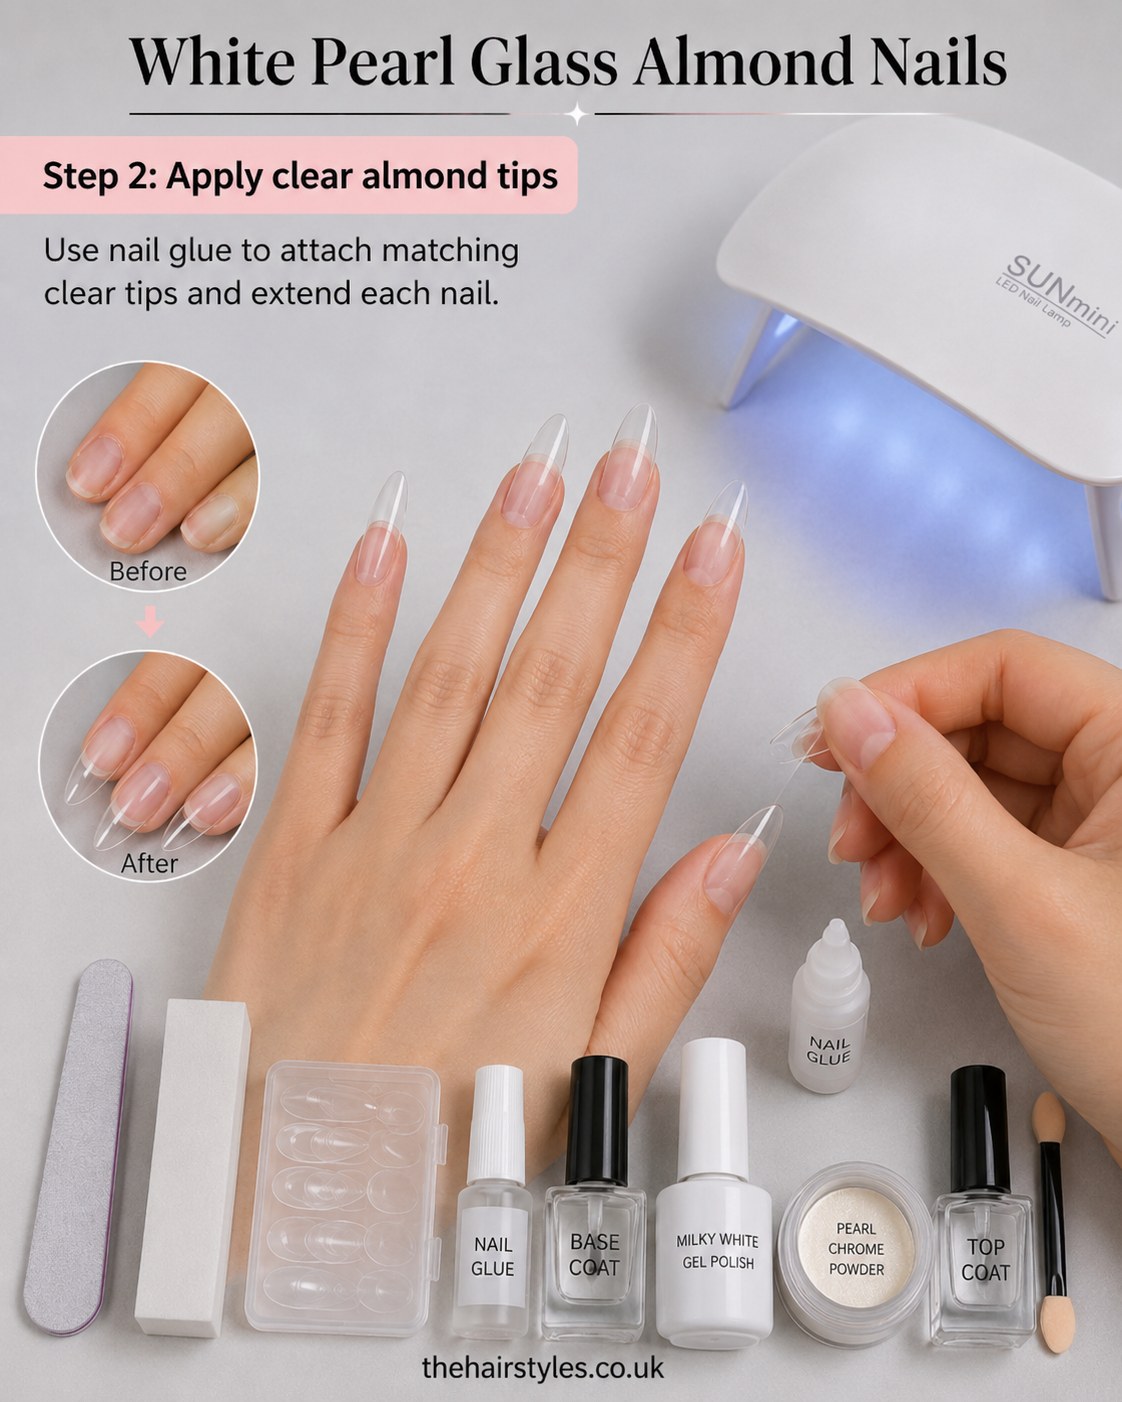
With nail glue and a set of clear tips, I matched each one to the nail bed width before committing — too wide and you'll be filing sidewalls for ages, too narrow and it pinches. Press, hold for a count of ten, done.
- Choose the closest-fitting tip first — sizing up from your own nail width, not guessing
- Apply glue thinly to both the tip's contact area and the natural nail, not just one
- Hold with slight pressure at the sidewalls, not the centre, to avoid air bubbles
You'll spot in the after photo the length is already there but still rough round the edges — that's deliberate, we shape properly next.
Filing and buffing into the almond shape
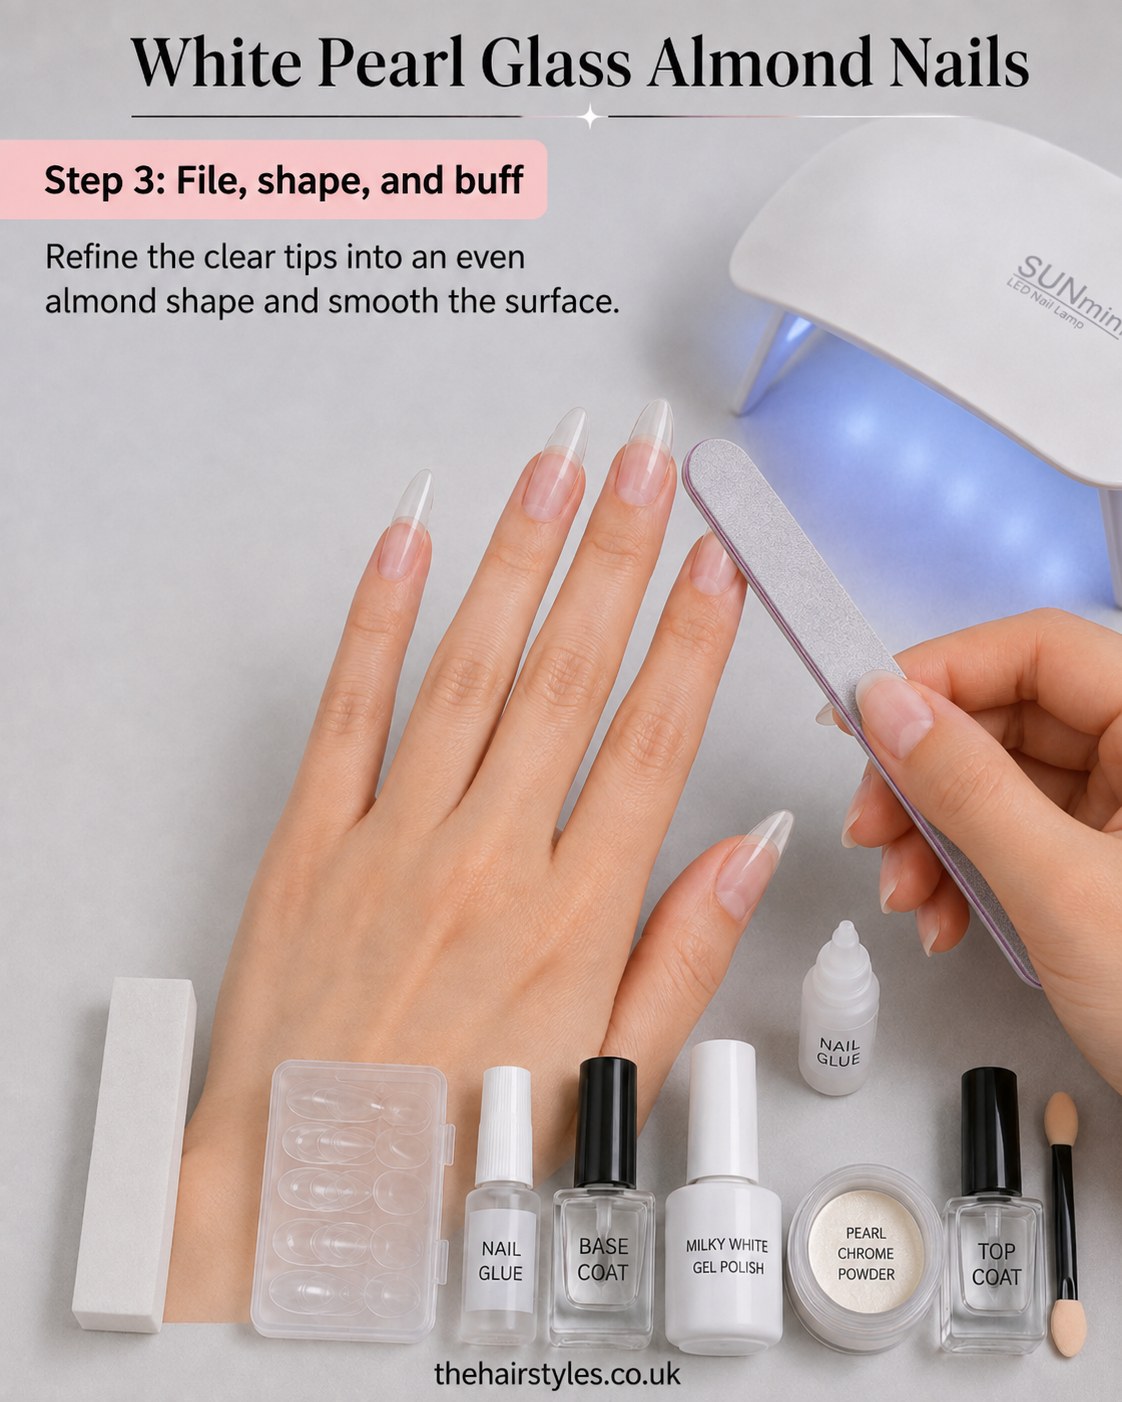
This is the step people rush, and it shows. An almond shape wants tapered sides curving up to a rounded (not pointed) tip, and you get there with patience and a fine-grit file, not brute force.
Work each nail in one direction rather than sawing back and forth — sawing creates heat and weak spots along the free edge, which is exactly where a fresh tip will snap first. Once the shape's even across all ten, go over the surface with the white buffer block to knock back any ridges from the glue line, so the gel coat ahead has a smooth, even canvas rather than bumps that'll show through the pearl finish later.
A thin base coat, no shortcuts
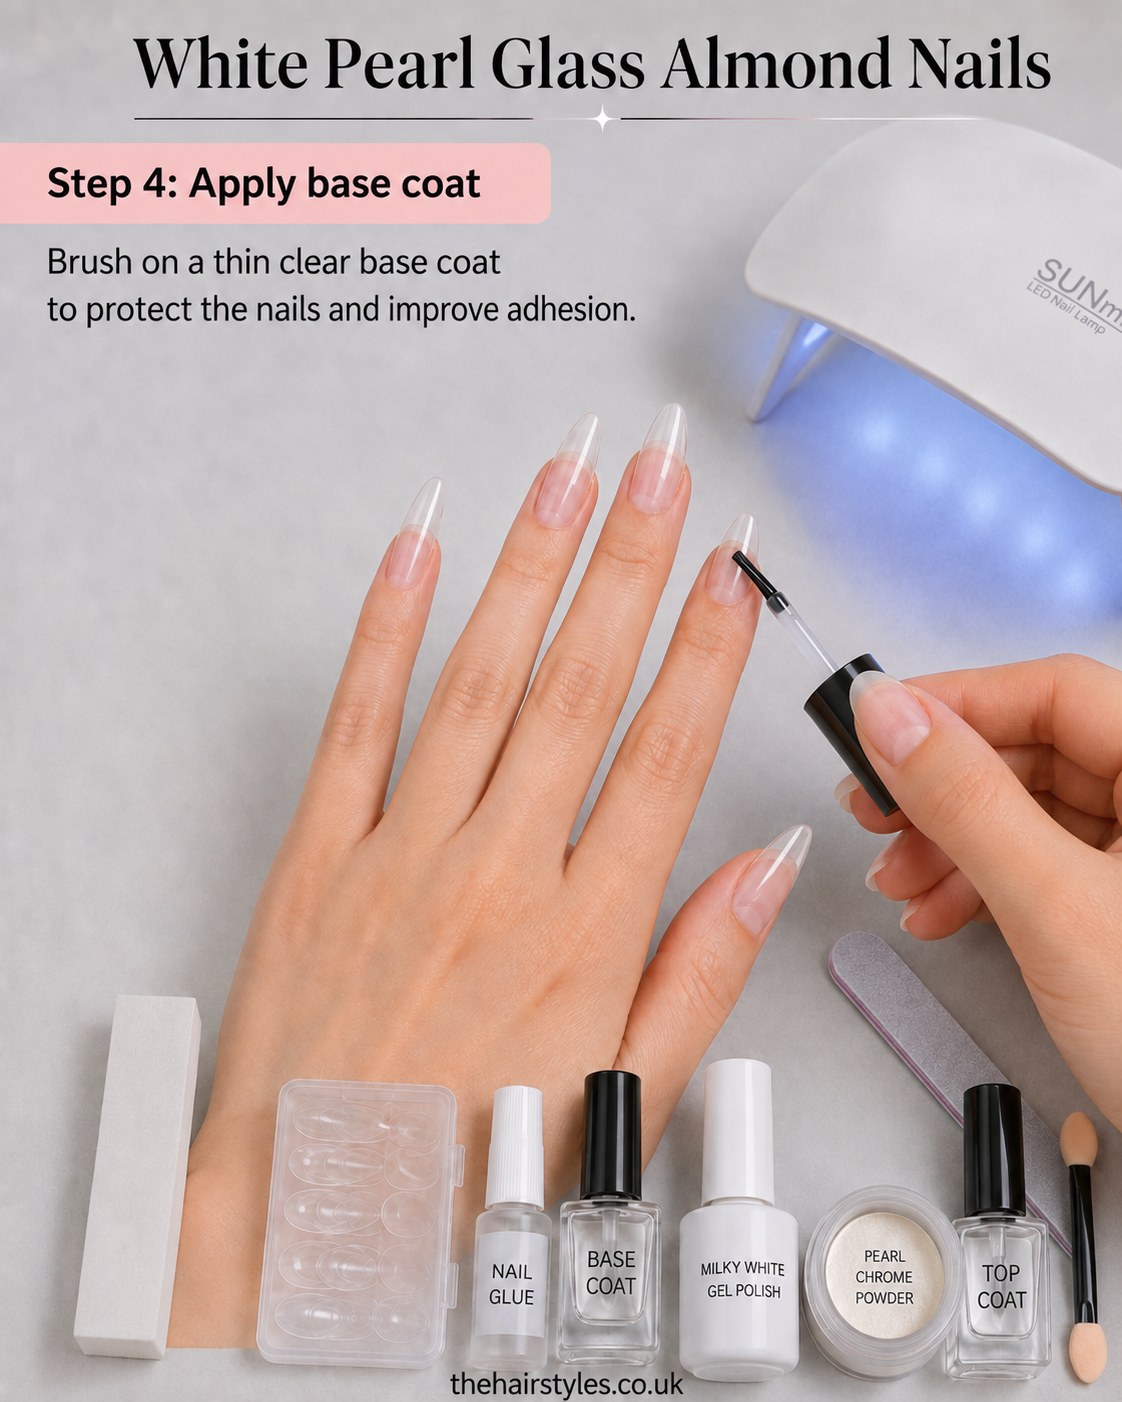
I know, base coat feels like the boring bit between the fun bits. It isn't optional. A thin, even layer protects the natural nail underneath and gives the milky gel something proper to grip, rather than pooling and peeling at the edges within a week.
The mistake I nearly made
I loaded the brush too heavily first time and it flooded my cuticle line — cured, that shows as a lumpy shadow you can't buff out without going back to bare nail. Wipe the brush against the bottle neck until it's nearly dry before you touch the nail, and cure under the lamp as directed on your gel before moving on.
The milky white gel, soft and translucent
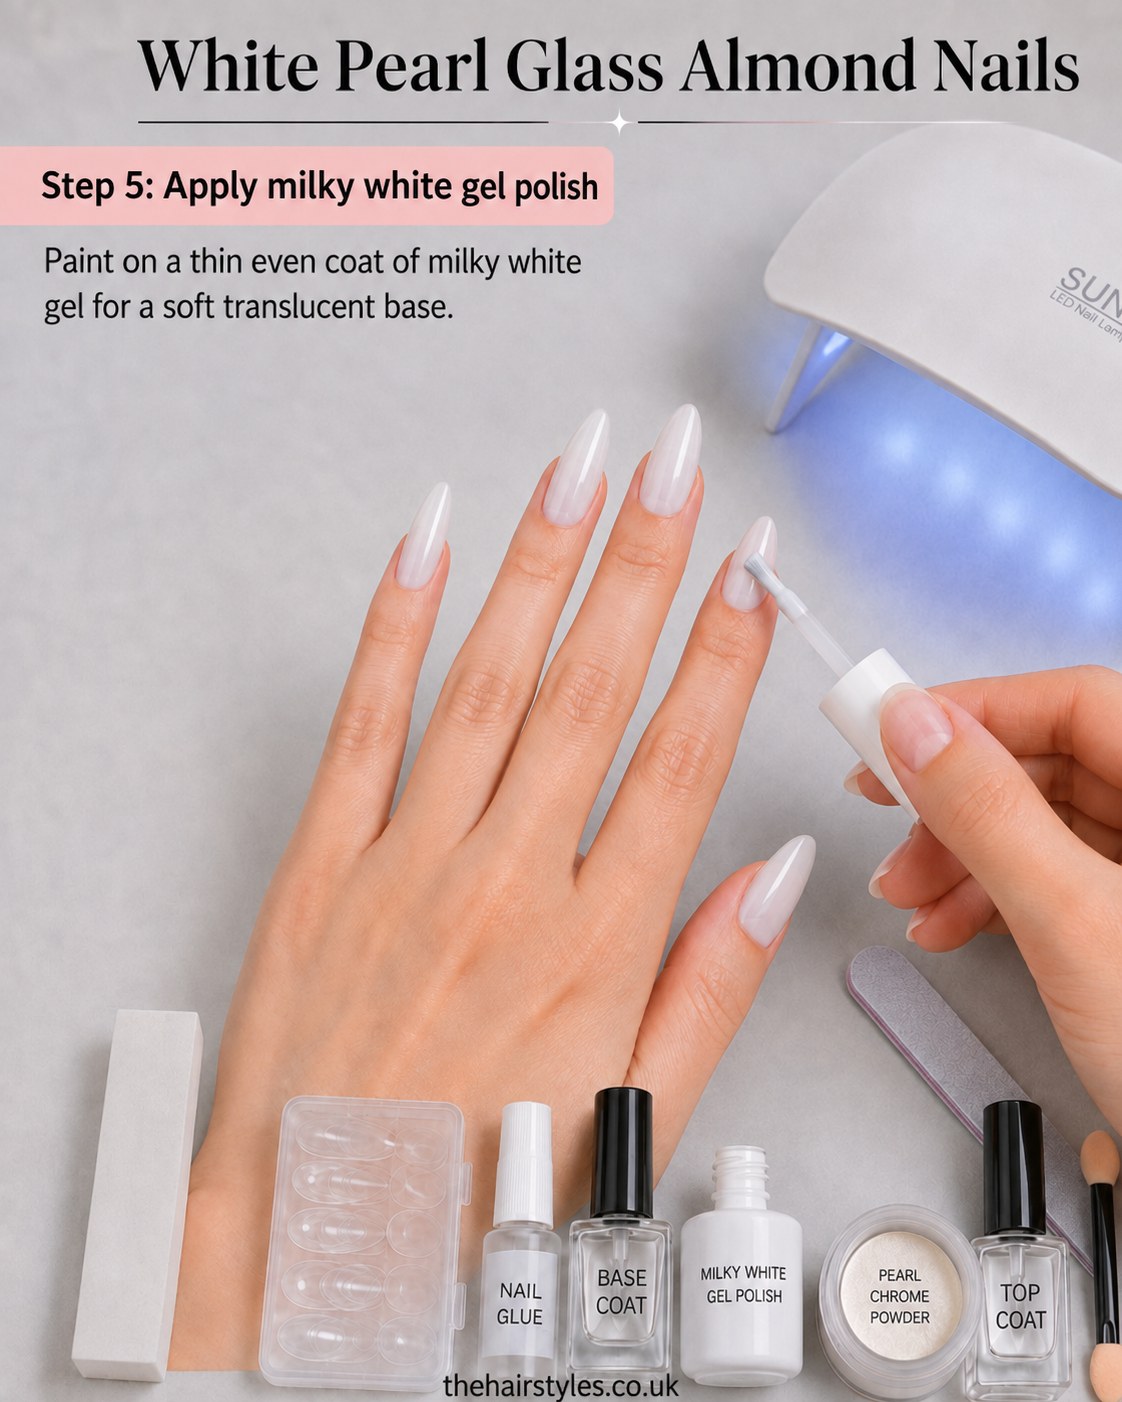
This is where the set stops looking like plain acrylic tips and starts looking like the finished thing. The milky white gel goes on almost sheer in the bottle but builds to that soft, cloudy, translucent white you can see settling across all four fingers in this shot — nothing chalky or flat about it.
- Paint on one thin coat, cap the free edge to seal it
- Cure under the lamp
- Repeat a second thin coat if the colour still looks streaky at the base
Resist the urge to go thick in one go — thin and cured twice always beats thick and gloopy once, on nails exactly as it does on a fringe with too much product.
Pressing on the pearl chrome shimmer
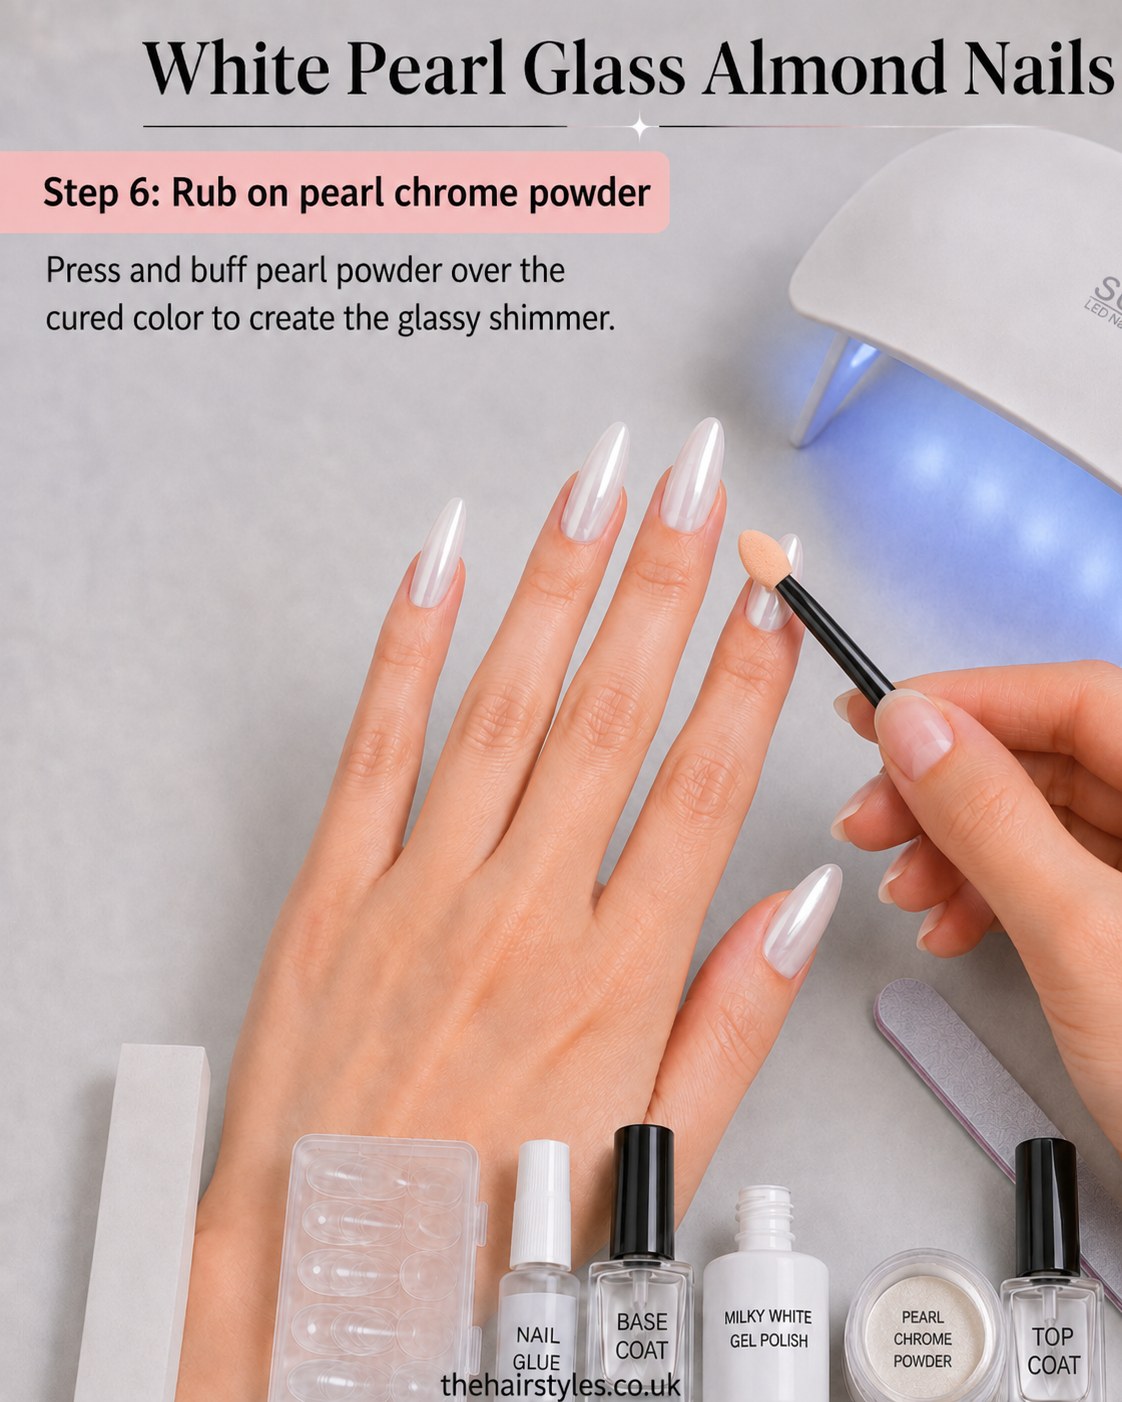
Here's the actual glass-nail trick, and it's oddly satisfying — pressing pearl chrome powder onto the cured milky base with a little foam applicator, buffing in gentle circular motions rather than rubbing hard in one direction.
What you're looking for: the powder catching the light in a soft, moving shimmer rather than sitting as a flat metallic film. If it looks patchy, you haven't pressed enough powder into the gel; go back over it before moving on rather than adding more coats after the fact.
You can already see in the photo how the shimmer sits differently under the lamp's blue-white light versus daylight — worth checking your work near a window too, the same way I always check a colour under a proper daylight bulb before letting anyone leave my chair.
Sealing everything with top coat
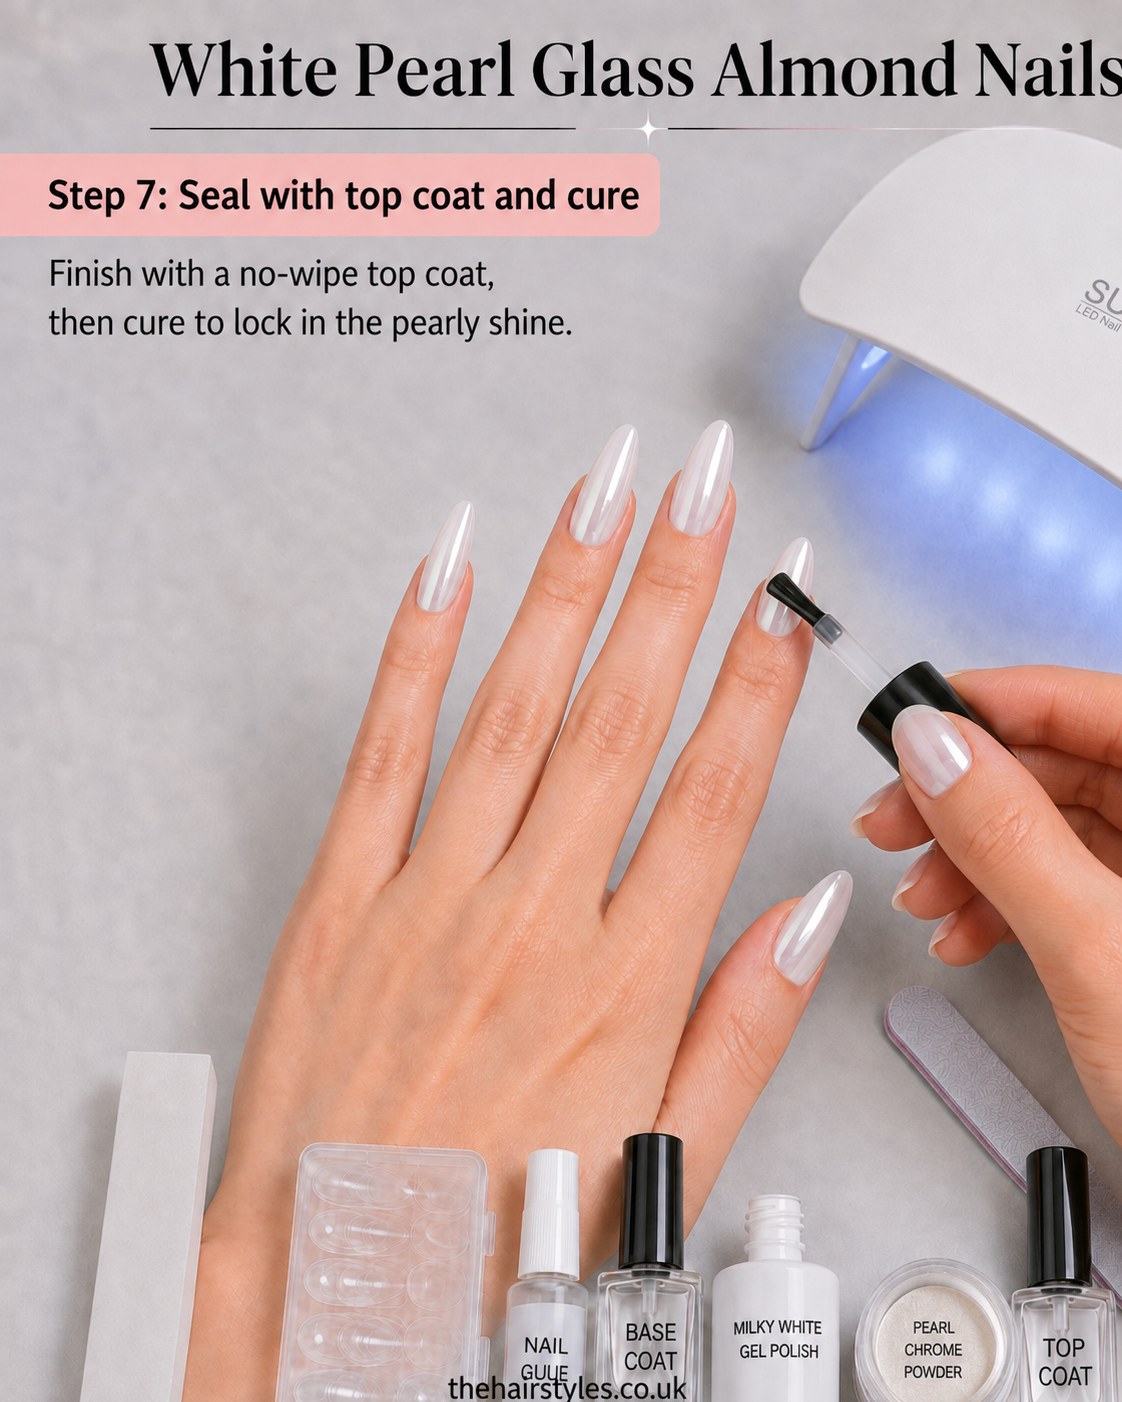
A no-wipe top coat is doing two jobs here: locking in that pearl shimmer so it doesn't rub off on your coat pockets by Tuesday, and giving the whole set the glassy, high-shine finish that gives this style its name.
- Cap each free edge as you go, sealing the tip so water can't sneak underneath
- Cure fully under the lamp — a set that feels tacky after curing hasn't had long enough, and tacky top coat picks up lint like nobody's business
- Check the sidewalls for any missed strip; that's the spot that peels first
You can see the shine already building in this photo, even mid-application — that's the sign it's curing properly.
The finished glass-pearl almond set
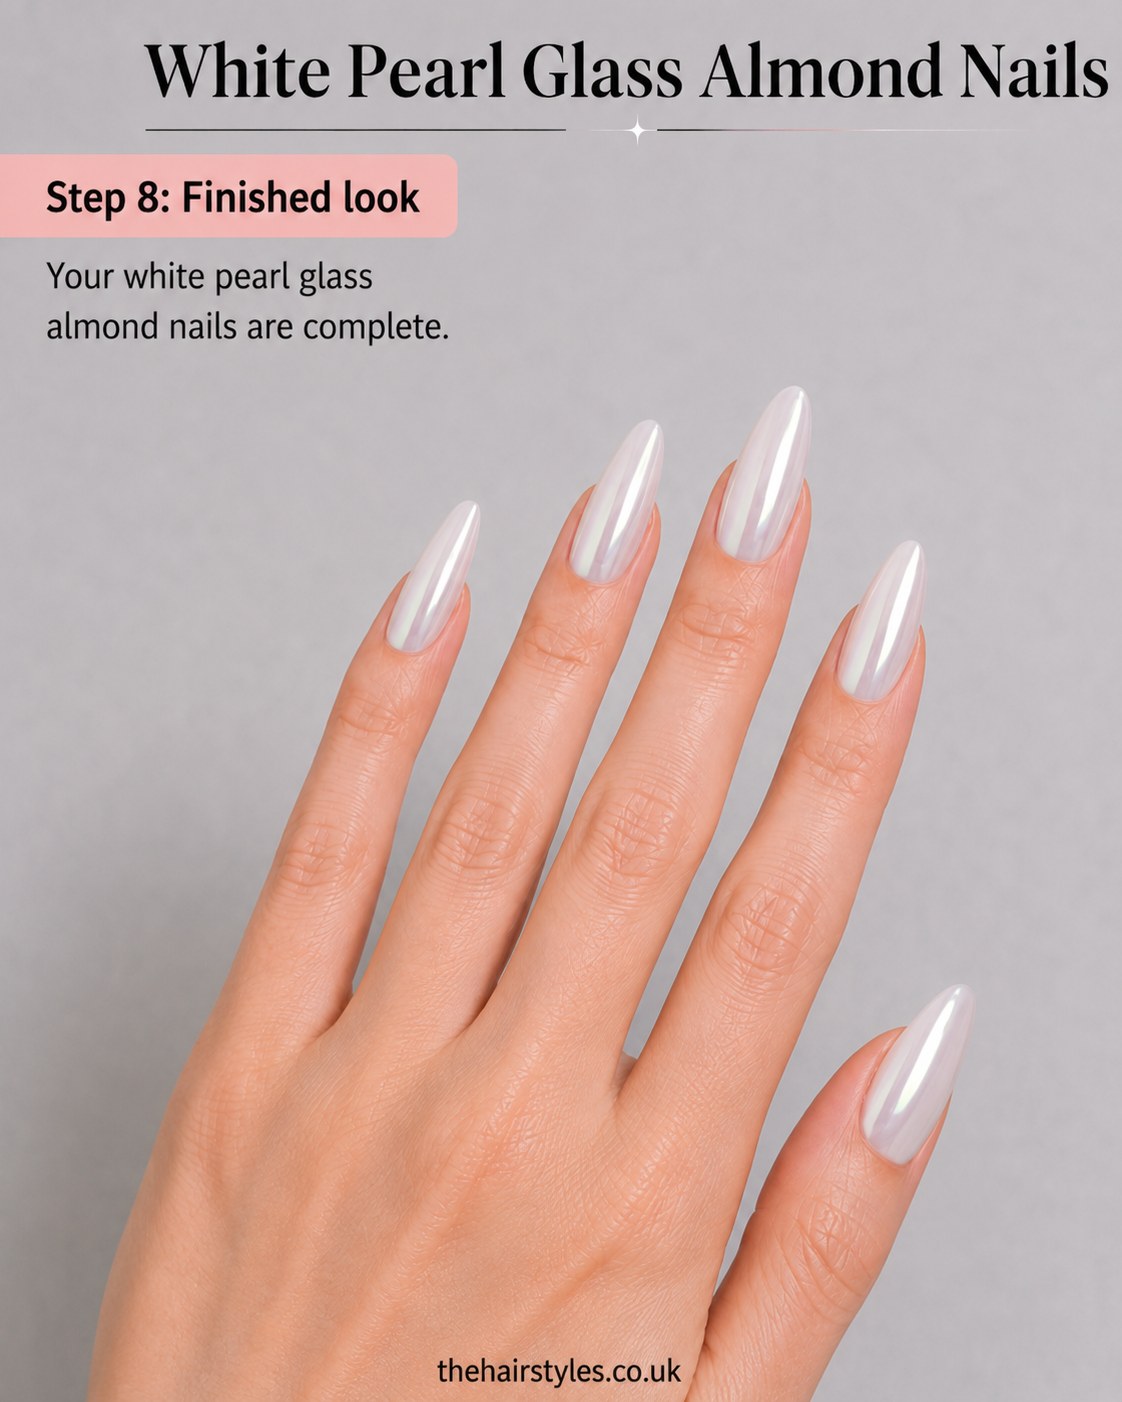
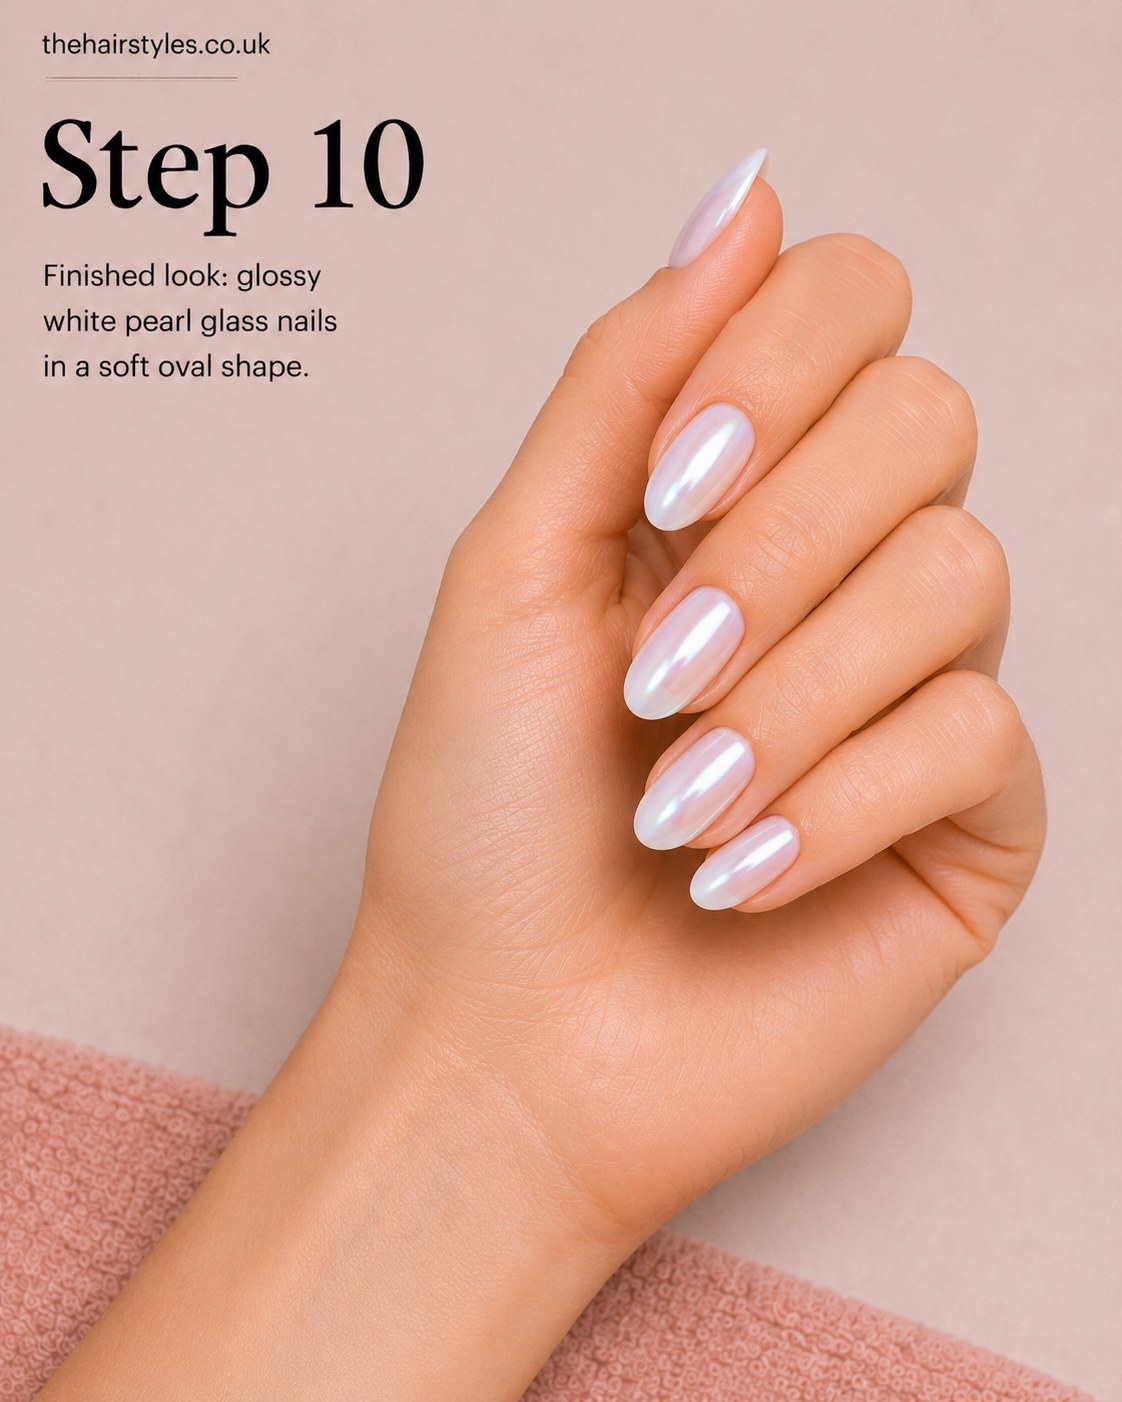
And there it is — five almond nails with that soft milky base and the pearl chrome catching light like the inside of an actual shell. No colour polish involved at all, which is honestly what surprises people most when I tell them.
In hairdressing terms I'd call this a Bit of Practice job rather than Dead Easy — the shaping and the powder buffing are where a first attempt and a fifth attempt look properly different. Give it a fair test run before you judge yourself against the photo.
I went into this expecting to be out of my depth, and came out with a set I've genuinely kept on for two weeks — which is more than I can say for some of the hair hacks that end up in my fails pile. If you fancy a go, block out a proper hour, put the phone on silent, and don't judge your first almond shape too harshly.

- Materials

Frequently Asked Questions
Will this pearl chrome finish last as long as a normal gel manicure?
With a proper no-wipe top coat sealing the powder in, mine held its shine for about two and a half weeks before any tip growth showed. Chipping usually starts at the sidewalls first if the top coat wasn't capped properly, so double-check that step.
Can I do this without a UV lamp?
No — the base coat, milky gel and top coat used here are all UV/LED cured gels, so you do need a lamp; a small home unit like the one shown is enough, you don't need salon-scale kit.
My pearl powder looks patchy instead of shimmery, what went wrong?
Almost always not enough powder pressed in before buffing, or buffing too hard in one direction rather than gentle circles. Press more powder into the still-tacky gel and go over it again rather than layering top coat over a thin patch.