I'll be honest, nail art isn't my chair - hair is my trade - but backstage at Fashion Week you're stood two feet from a session nail artist for eight hours a day and some of it sticks. This blueberry French tip design is one I nicked the idea for years ago and finally sat down at my own kitchen table to test properly, brush by brush. It's fiddly in places, gorgeous at the end, and honestly more forgiving than it looks in the photos.
Prep and Shape: The Bit Nobody Wants to Rush
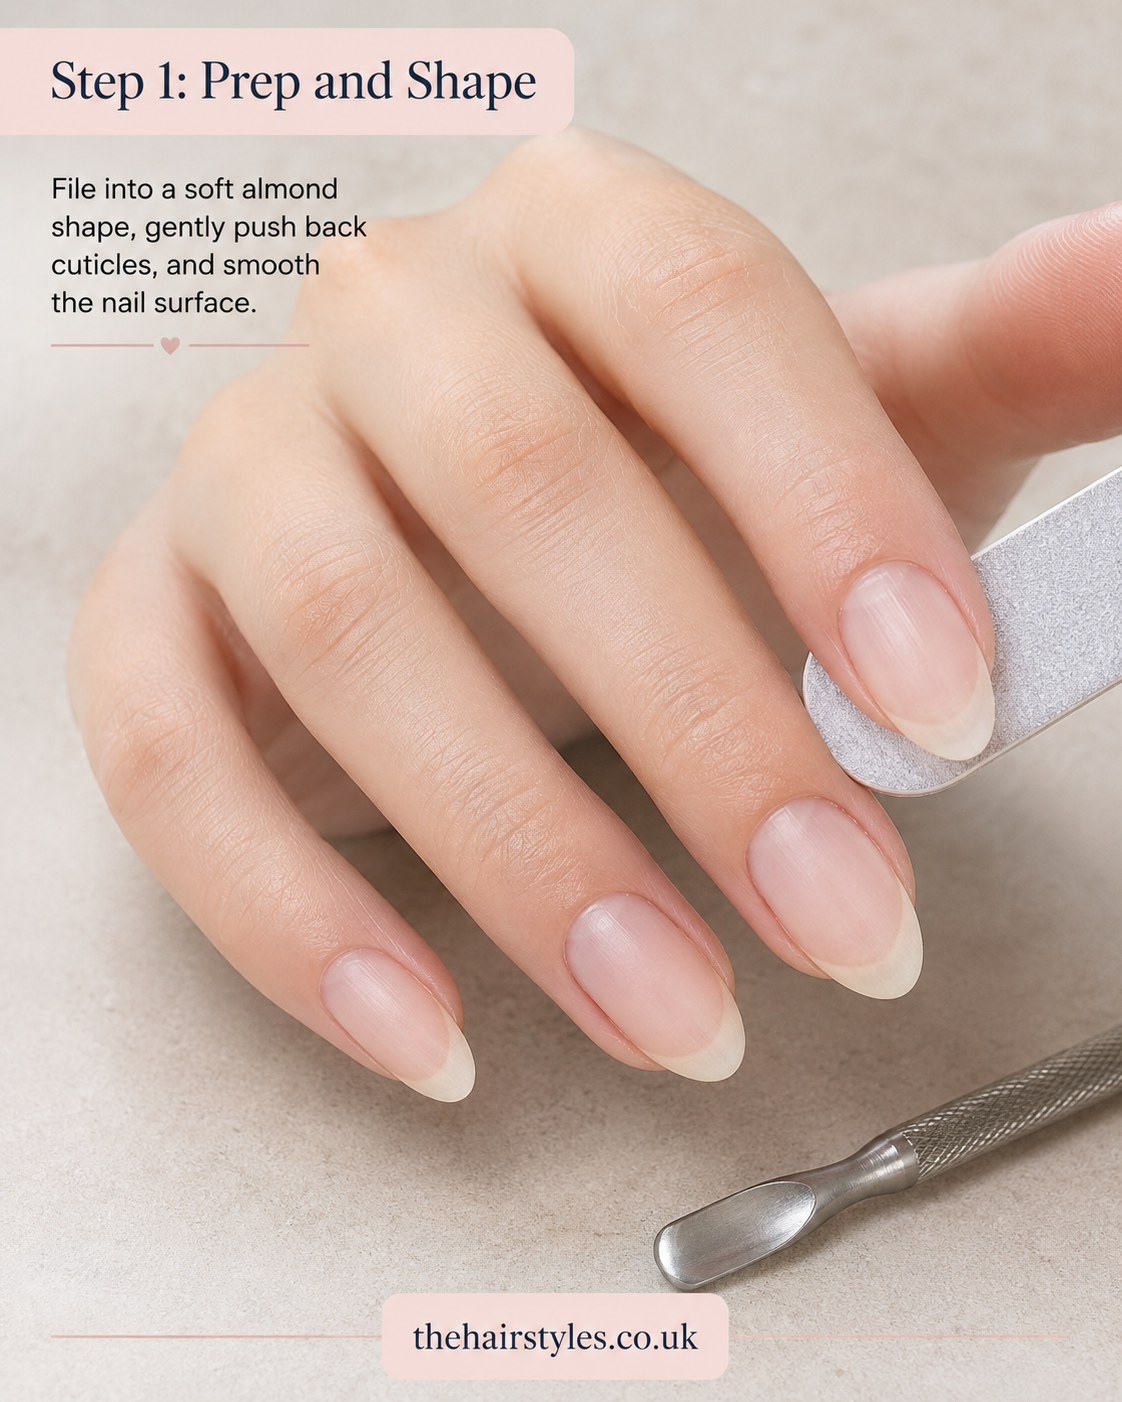
Every good manicure starts the same way every good haircut does - with honest prep, not the fun part. File each nail into a soft almond shape, working in one direction rather than sawing back and forth, then gently push back the cuticles and buff the surface smooth.
My nan's rule was look after the hair first, the style comes second - and it's exactly the same with nails. Paint goes on cleaner, sits flatter and lasts longer over a properly prepped nail bed than over a rushed one.
- Skip cutting cuticles - push, don't snip, unless you know exactly what you're doing
- Wipe with a lint-free pad after filing to remove dust before any polish goes near
Base Coat: Your Insurance Policy
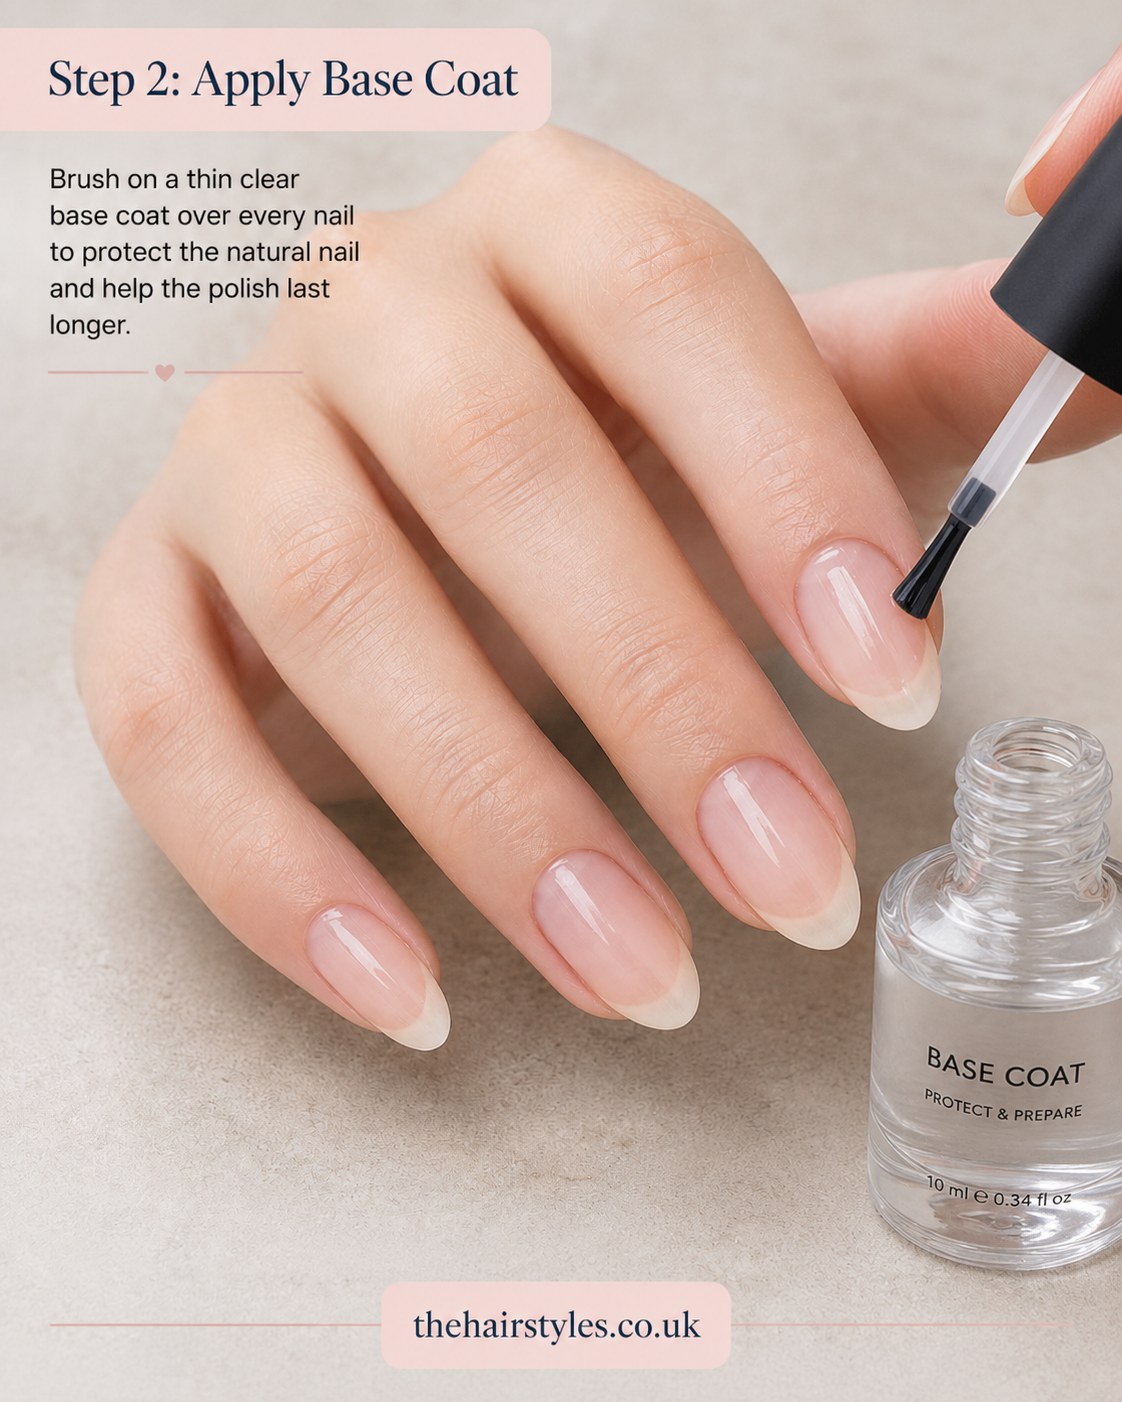
Brush on a thin clear base coat over every nail. It looks like nothing is happening, which is the point - this layer protects the natural nail from staining and gives the colour something smooth to grip onto, so your yellow tips and blue dots actually stay put later.
Let it go properly touch-dry before you move on. I timed this at roughly two minutes a hand at my own kitchen table, and skipping it is the single most common reason a home manicure chips by day two.
The Nude Base: Building a Clean Canvas
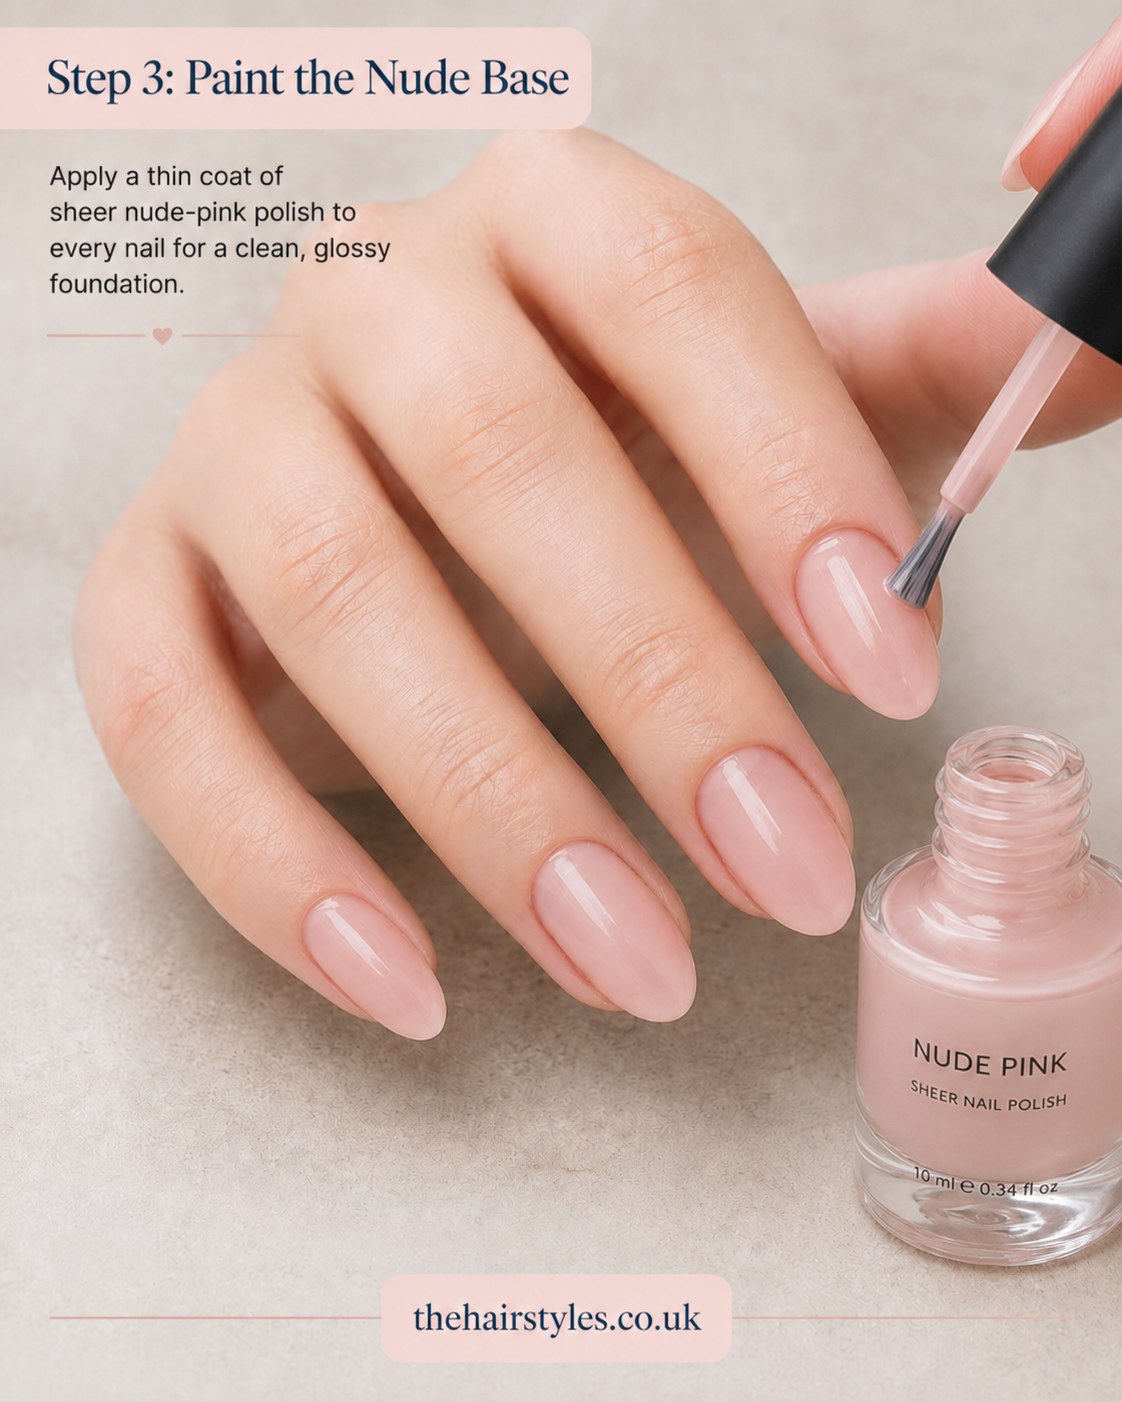
A thin coat of sheer nude-pink polish goes over every nail here, giving that clean, glowing foundation the whole design sits on. Sheer means one coat looks a bit patchy - that's normal, do a second thin coat rather than one thick one, which is where streaking creeps in.
A session nail artist once told me thin coats, more of them, beats one thick coat every single time - it's the exact same rule I give juniors about blow-dry sections.
Let each coat dry fully before the next. Rushing this stage is the classic mistake, and it shows up as drag marks the second you try to paint your French tip over the top.
Creating the French Tips
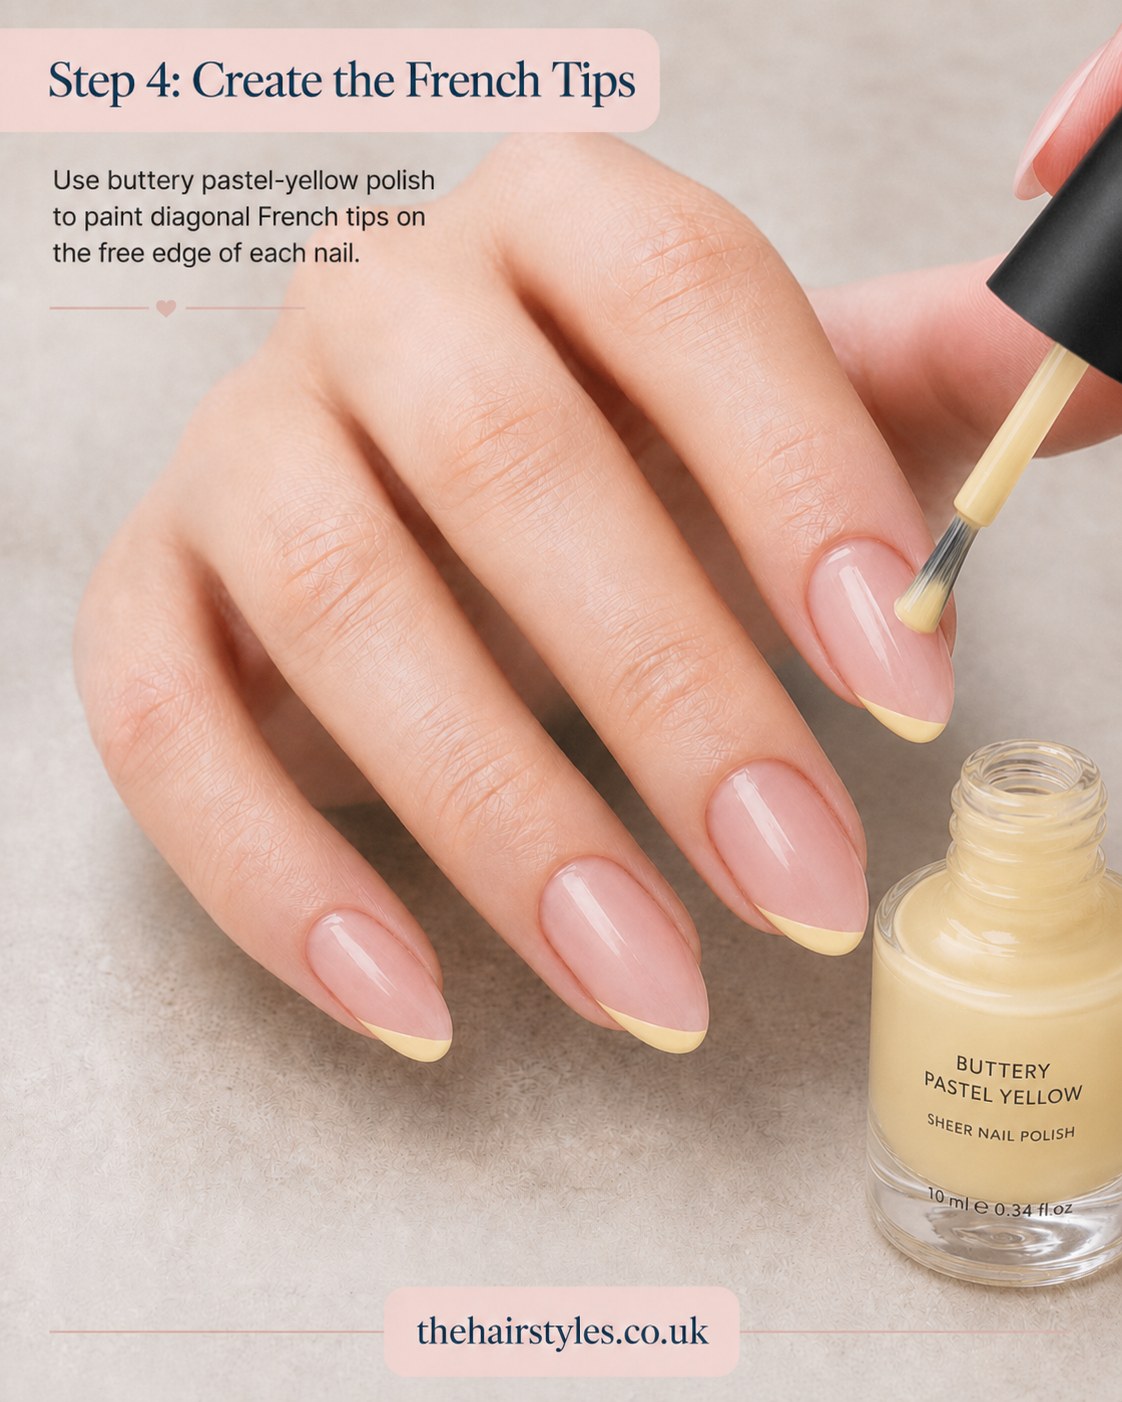
Now for the buttery pastel-yellow, painted in diagonal French tips across the free edge of each nail. This is where the design earns its Steady Hands label - the angle matters more than speed.
- Load the brush lightly - too much polish pools at the smile line
- Paint from one corner to the centre, then repeat from the other corner to meet it
- Wipe the brush clean between nails so the tip stays crisp, not smudged
Don't panic if your first two tips look wonky - that's exactly what step five is for.
Perfecting the Tip Shape
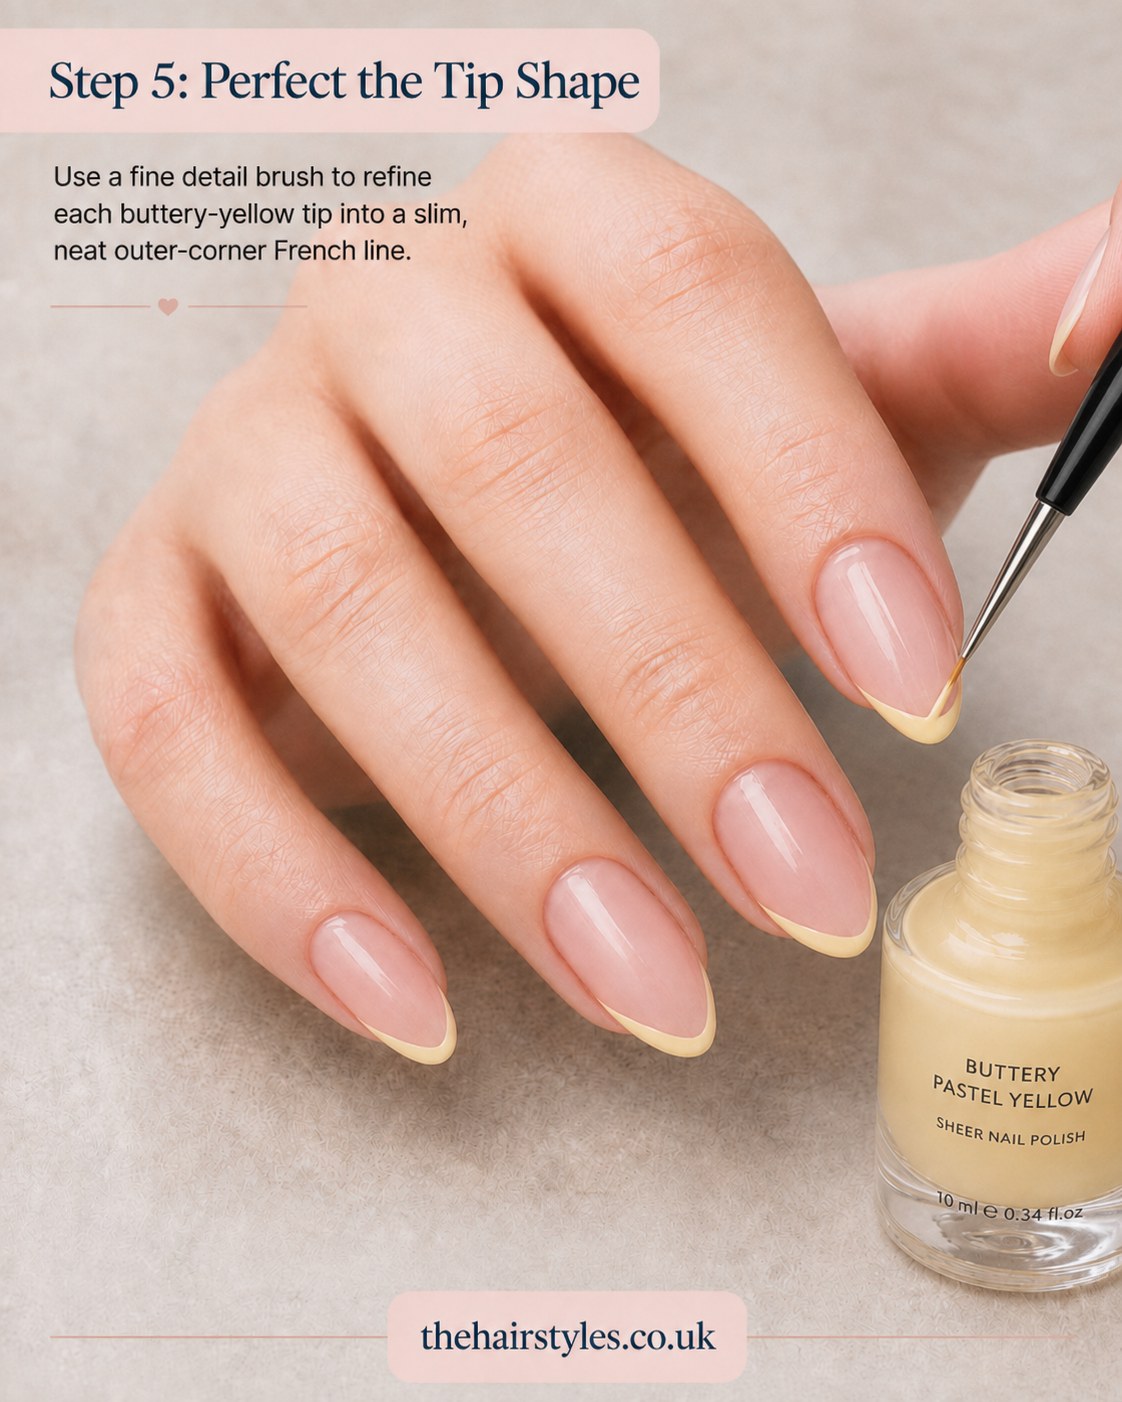
This is the corrective pass, and it's the step that separates a scrappy French tip from a proper one. Take a fine detail brush - a thin liner brush is fine if that's what's in the drawer - and go back over each yellow tip to refine it into a slim, neat outer-corner line.
Load the brush with a very small amount of polish, wipe most of it off on a tissue, and use the brush almost dry to sharpen the edge. If a line's still too thick, a cotton bud dipped in a touch of remover will clean the excess back without disturbing the nude base underneath.
Adding the Blue Dots
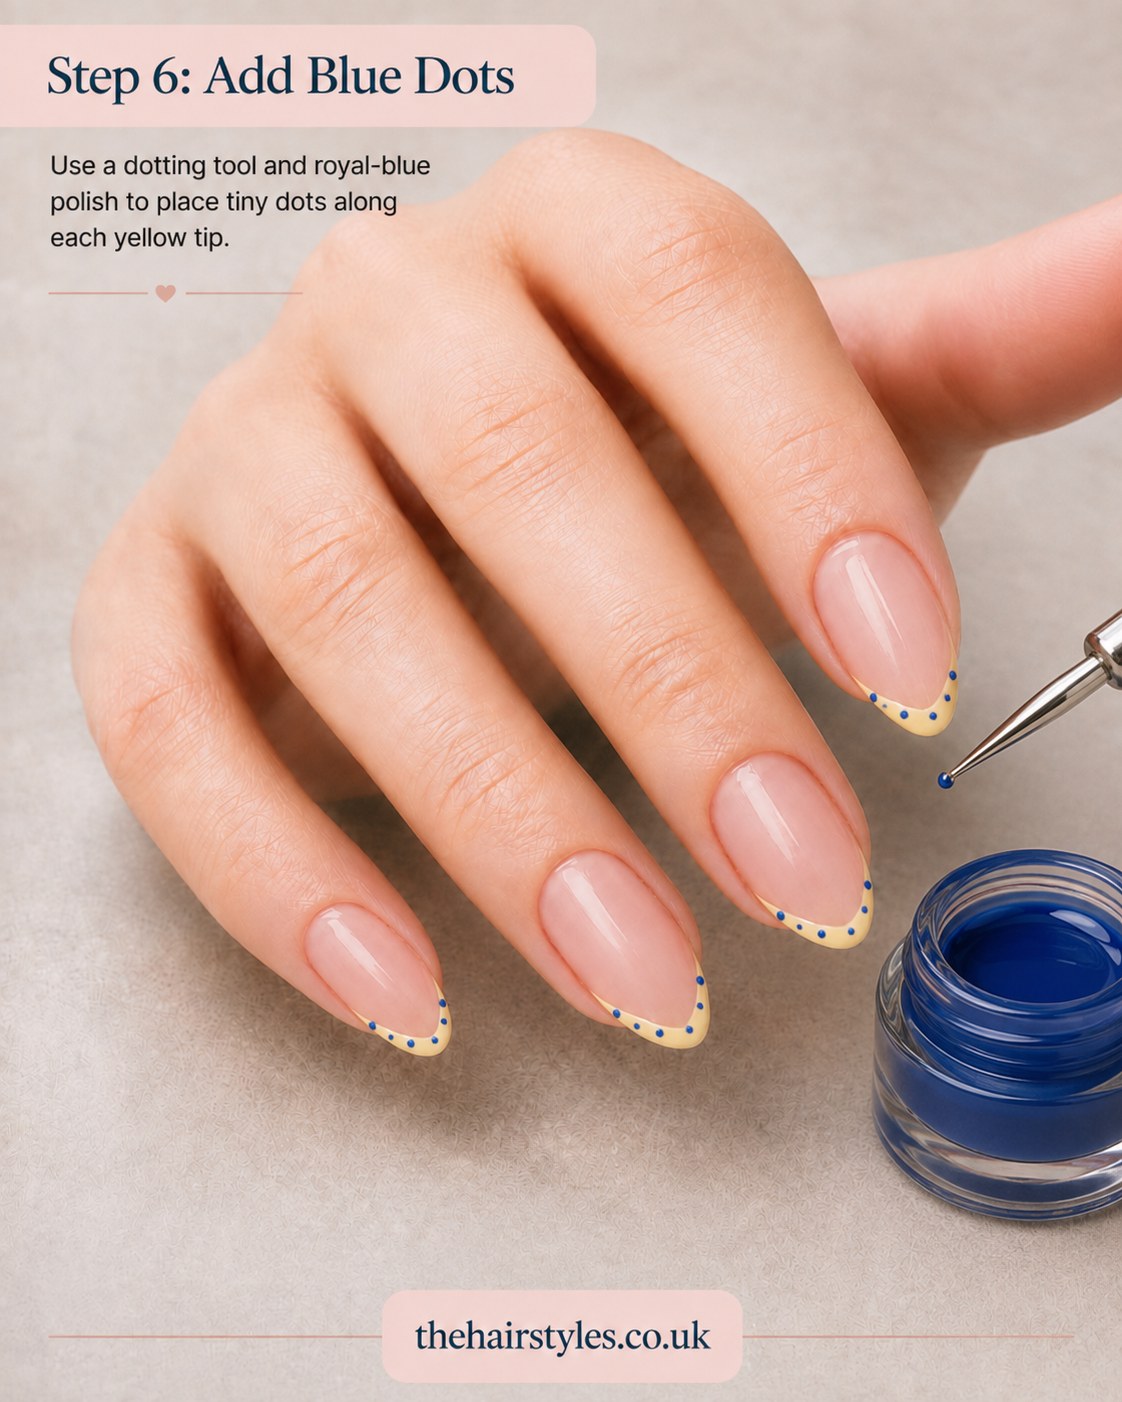
Grab a dotting tool - or a bobby pin head in a pinch, which is my genuine backstage substitute when the kit bag's gone missing - and dip it into royal-blue polish. Place tiny, evenly spaced dots along each yellow tip.
Consistency in dot size matters far more than perfection in placement. Re-dip the tool for every single dot rather than trying to stretch one load across three, which is exactly how you end up with one fat blob and four ghost dots.
- Practise on paper first if you've never used a dotting tool before
- Keep a cotton bud handy for instant clean-up of stray dots
Painting the Blueberry Accent
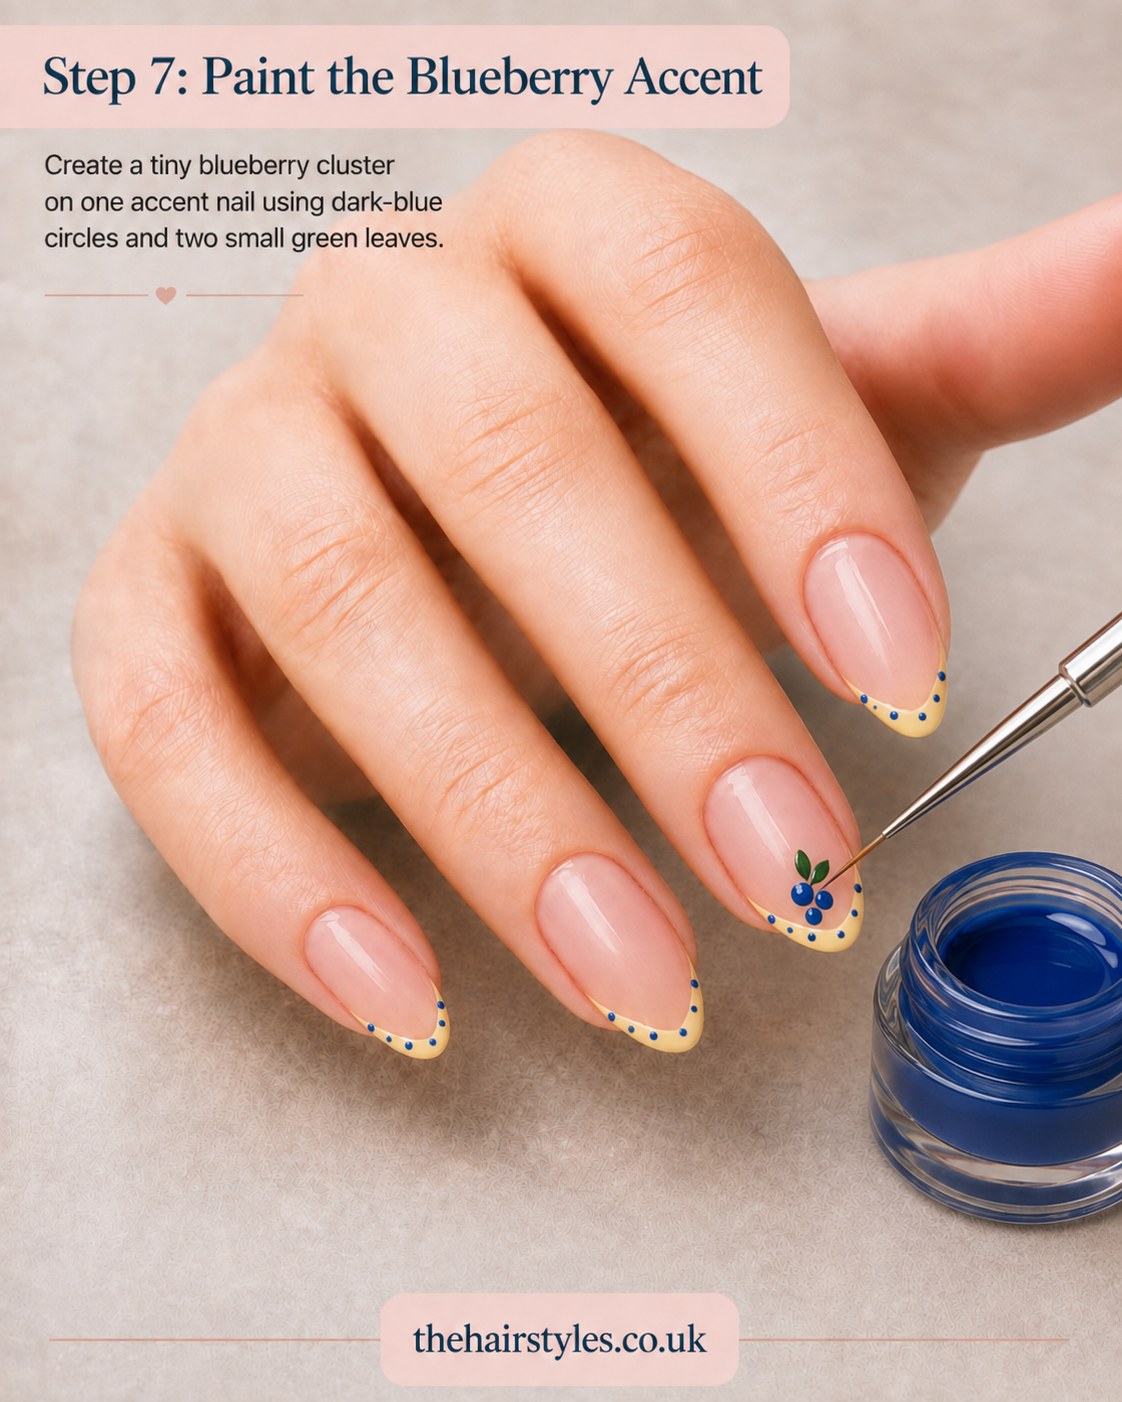
Pick one nail - the ring finger works beautifully - as your accent, and build a tiny blueberry cluster using dark-blue circles finished with two small green leaves. This is the fiddliest step in the whole tutorial, so work slowly and use the very tip of your dotting tool or a fine brush.
Three or four dark-blue dots grouped together read as a cluster of berries far more convincingly than a neat, evenly spaced row would. Add the leaves last, in a contrasting green, right at the base of the cluster.
Sealing With Top Coat
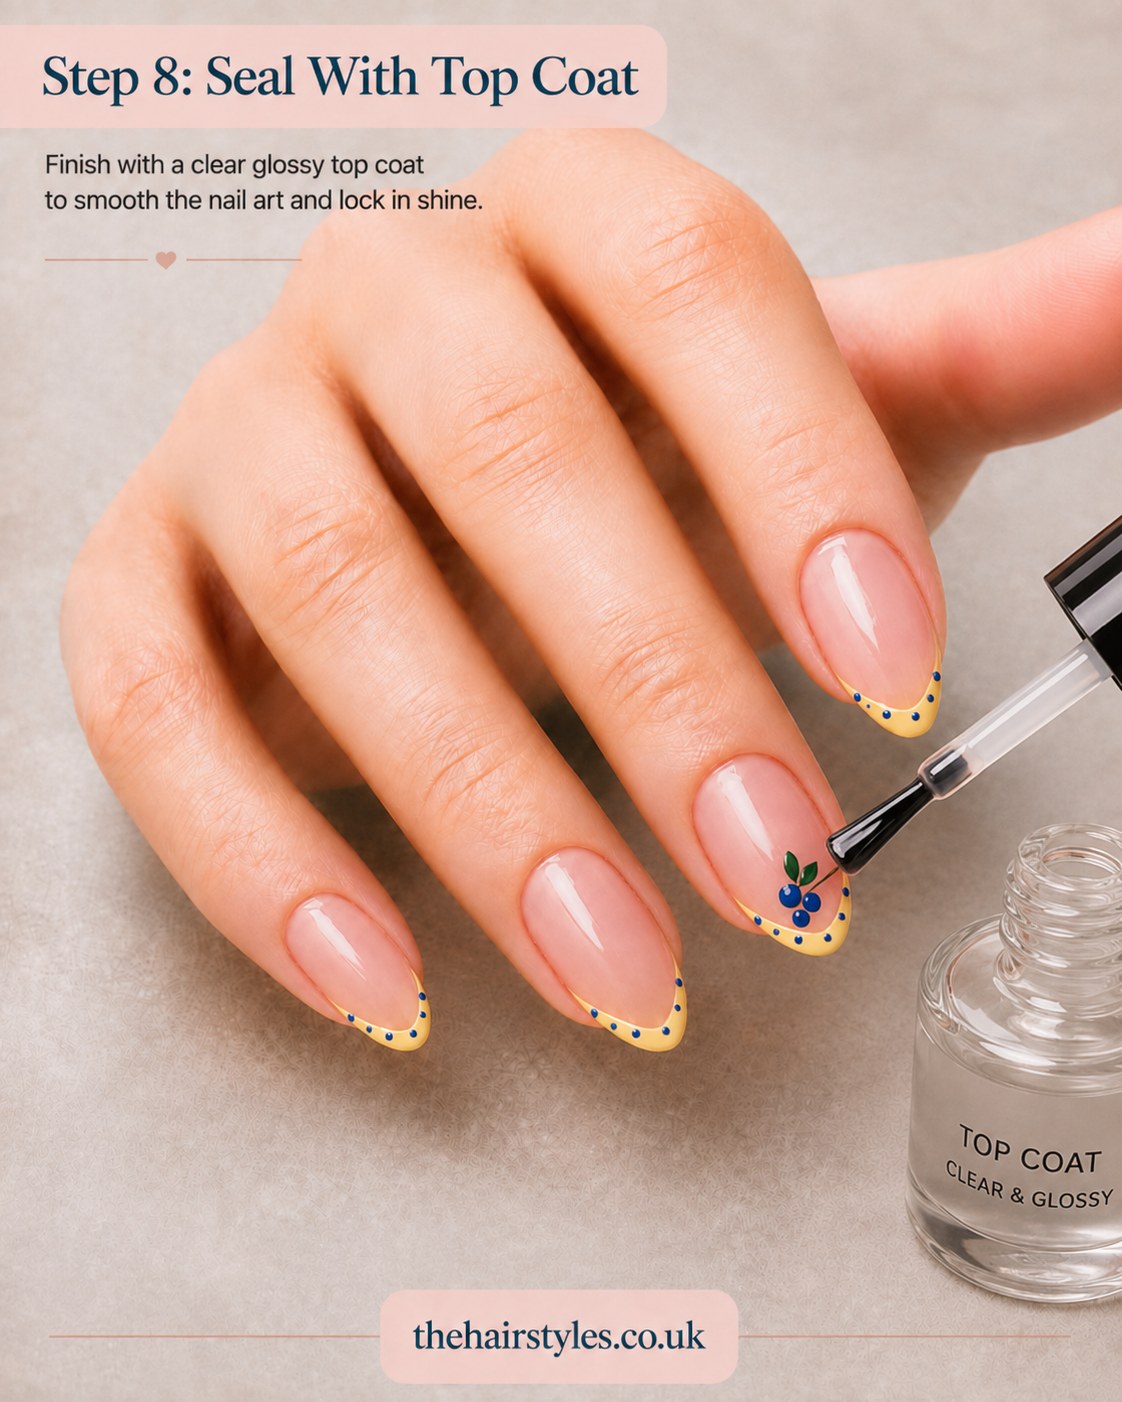
Finish every nail with a clear glossy top coat. This is what pulls the whole design together - it smooths any texture from the dotting and painting work and locks the shine in, so your blue accents don't sit dull against the glossy nude and yellow.
Let this dry properly before you do anything with your hands - and I mean properly, not the five-minutes-and-hope approach. Freshly top-coated nails and a hot kettle handle are not friends.
The Finished Set
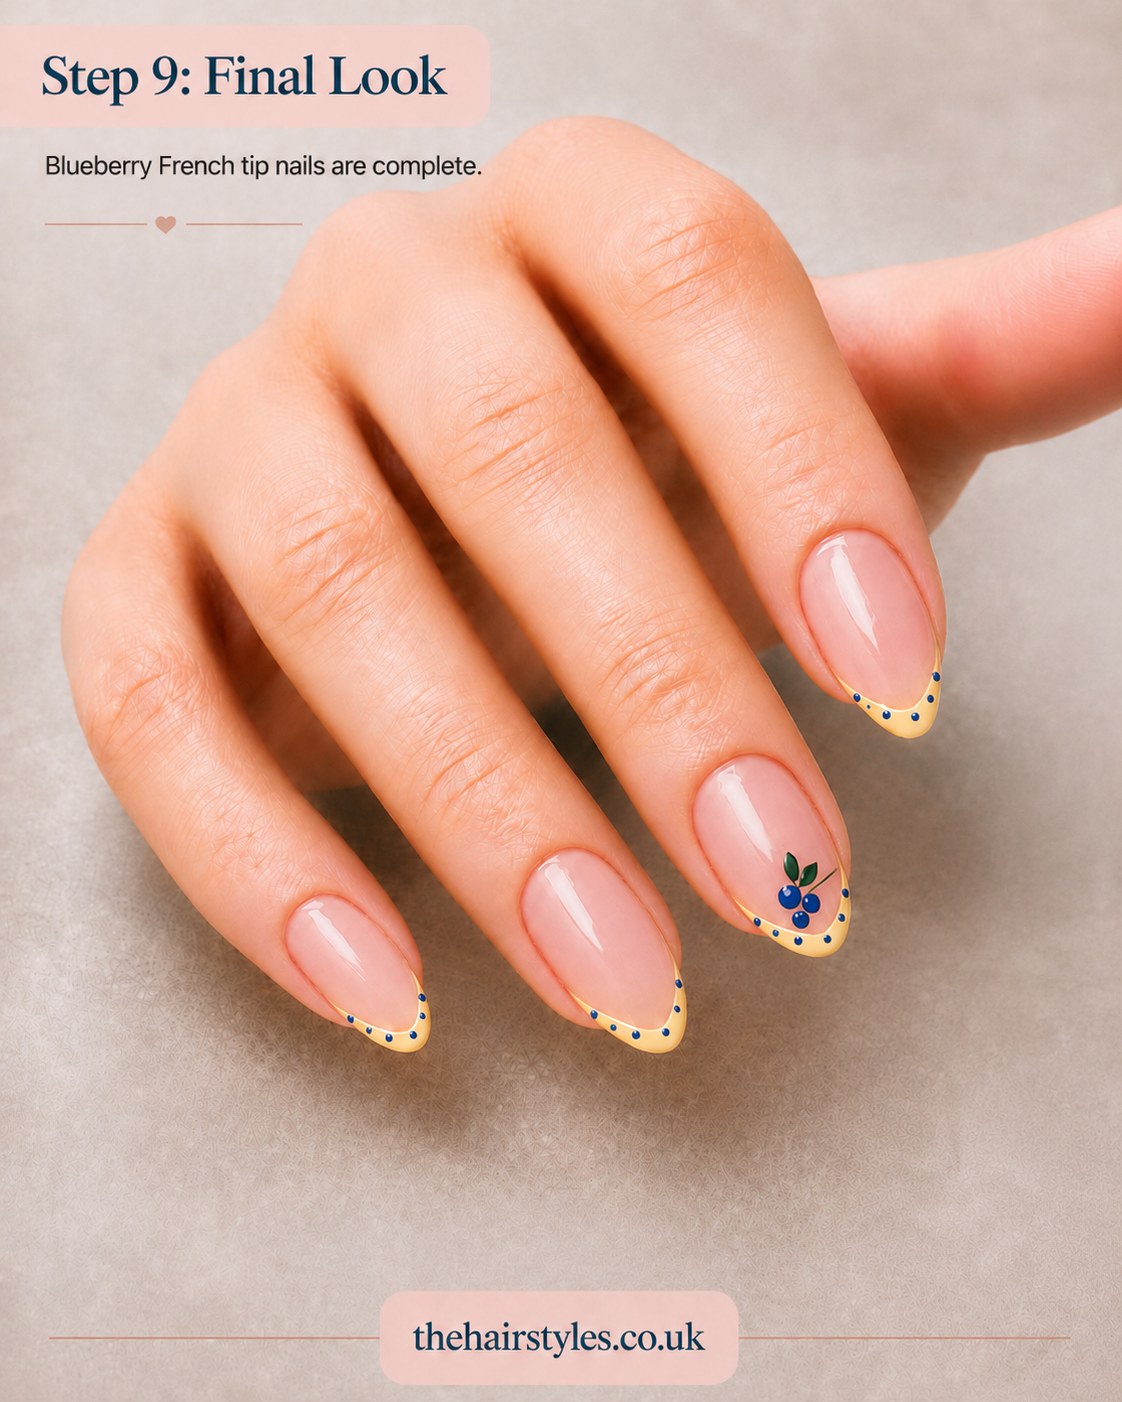
And there it is - a full set of blueberry French tips, buttery yellow against a soft nude base, with that one hand-painted berry cluster doing all the storytelling. It photographs beautifully, and it held up on my own hands through a full day of typing, tea-making and one particularly enthusiastic game of fetch with Keith the cat.
Honest wear expectation: without a gel top coat, budget on this lasting three to five days before tip wear shows. It's a lovely one for a wedding guest look, a christening, or just because spring's finally arrived and you fancy something other than plain nude.
I'm not going to pretend this replaces a proper trip to a nail tech, but for an evening at the kitchen table with the radio on, it's a lovely one to sit with. Nell's already put in a request for a version with fewer dots and more berries, which tells you everything about how a seven-year-old edits a design brief.

- Products & Tools


Your Questions, Answered
Do I need gel polish for this to last properly?
Not for the technique itself, but gel will roughly double the wear time. This tutorial uses regular polish throughout, so expect three to five days rather than the two-plus weeks gel manages.
I don't own a dotting tool - what can I use instead?
A bobby pin ball-end or the rounded tip of a hair pin works surprisingly well for the blue dots. For the finer blueberry cluster, a cocktail stick gives you more control than most household stand-ins.
Can this design work on shorter nails?
Yes, though the French tip band will naturally sit narrower. Keep the diagonal angle gentler on short nails so the yellow tip doesn't overwhelm the whole nail.
My tips came out uneven - can I fix it without starting again?
That's exactly what step five, the fine detail brush pass, is designed to rescue. Go back over the wonky line with a barely-loaded brush before you move on to the dots.