The 1960s cut crease is one of those makeup looks that still walks into a room before you do. I love it because it is structured, playful and surprisingly wearable once you understand the shape. The key is a clean socket line, a bright lid and enough patience to let each layer settle.
I have tested this style as a beauty enthusiast alongside years of working around session make-up artists backstage, and I always tell readers the same thing: do not rush the crease. A first attempt is usually slower, but the finished result is worth the extra few minutes. The original mod era favoured pale lids, strong crease definition, dramatic lashes and graphic liner, details that continue to inspire modern versions of the look.
Quick guide to this 60s cut crease
- Difficulty: Steady Hands
- Professional timing: around 25 minutes
- First attempt timing: around 45 minutes
- Best for: anyone wanting a vintage-inspired statement eye
Preparing the Eyes for a 60s Cut Crease Base
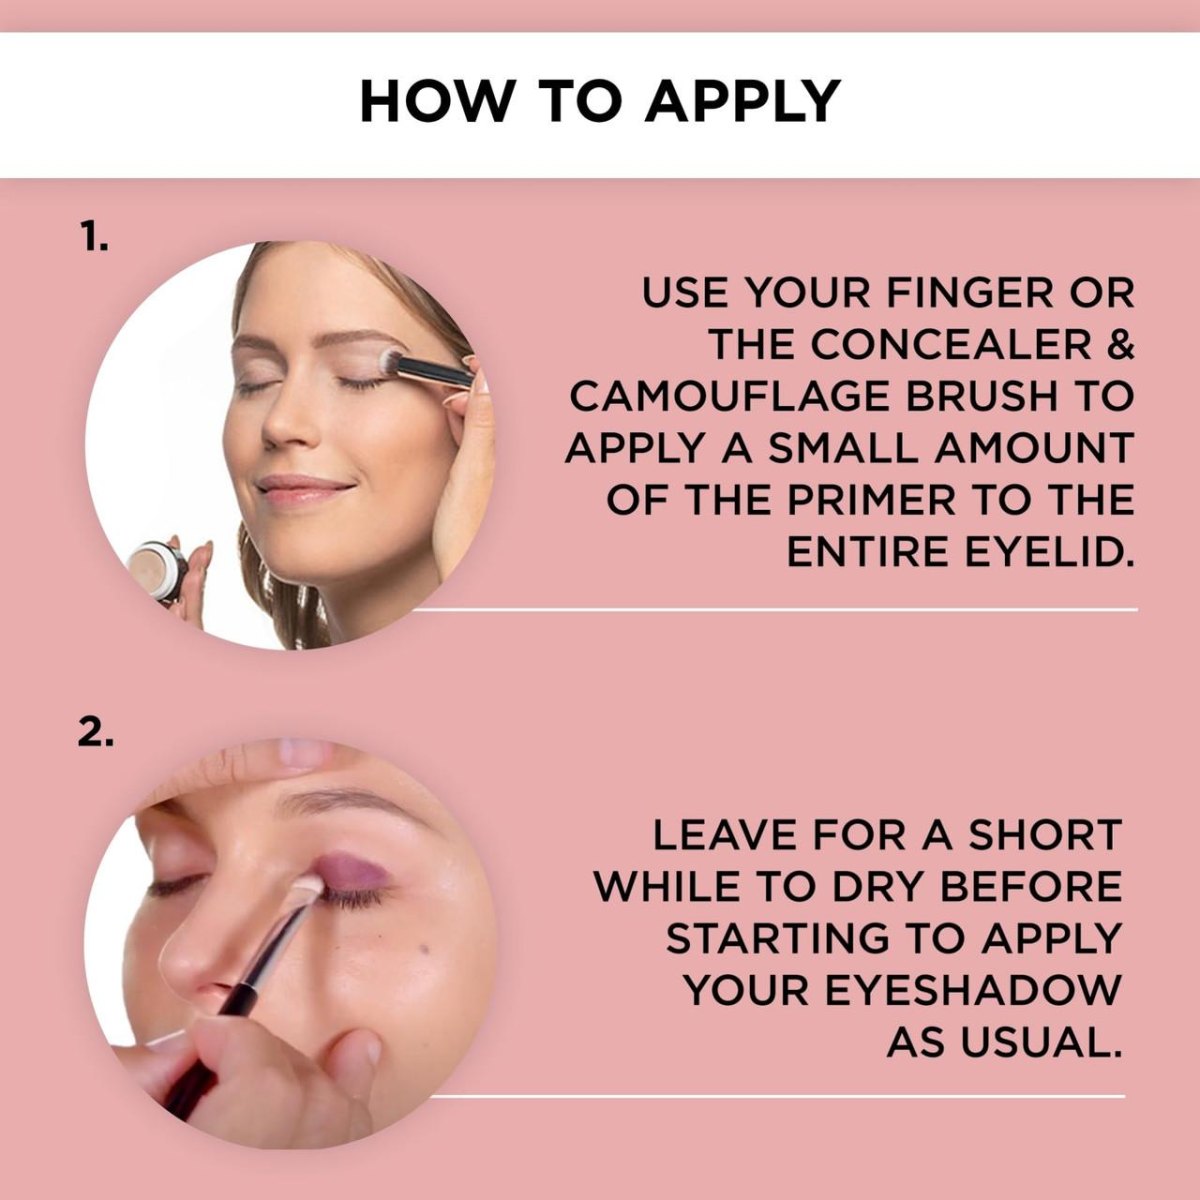
Before drawing a single line, I prep the eyelids properly because a cut crease needs a smooth canvas. A lightweight eye primer helps the shadows grip, and a pale base creates that unmistakable bright 60s lid effect that made the style famous.
I start with a neutral shadow through the socket area, keeping the lid clean and light. This is the bit where many people over-blend; the vintage shape depends on contrast, not a smoky finish.
- Prime. Apply eye primer and set lightly with powder.
- Place. Add a soft transition shade above the natural crease.
- Brighten. Press a pale matte shadow onto the lid.
My backstage tip
If your eyelids crease quickly, keep the first layers thin. Heavy product is usually what causes the lovely sharp line to disappear by lunchtime.
Creating the Classic Rounded 60s Crease Shape
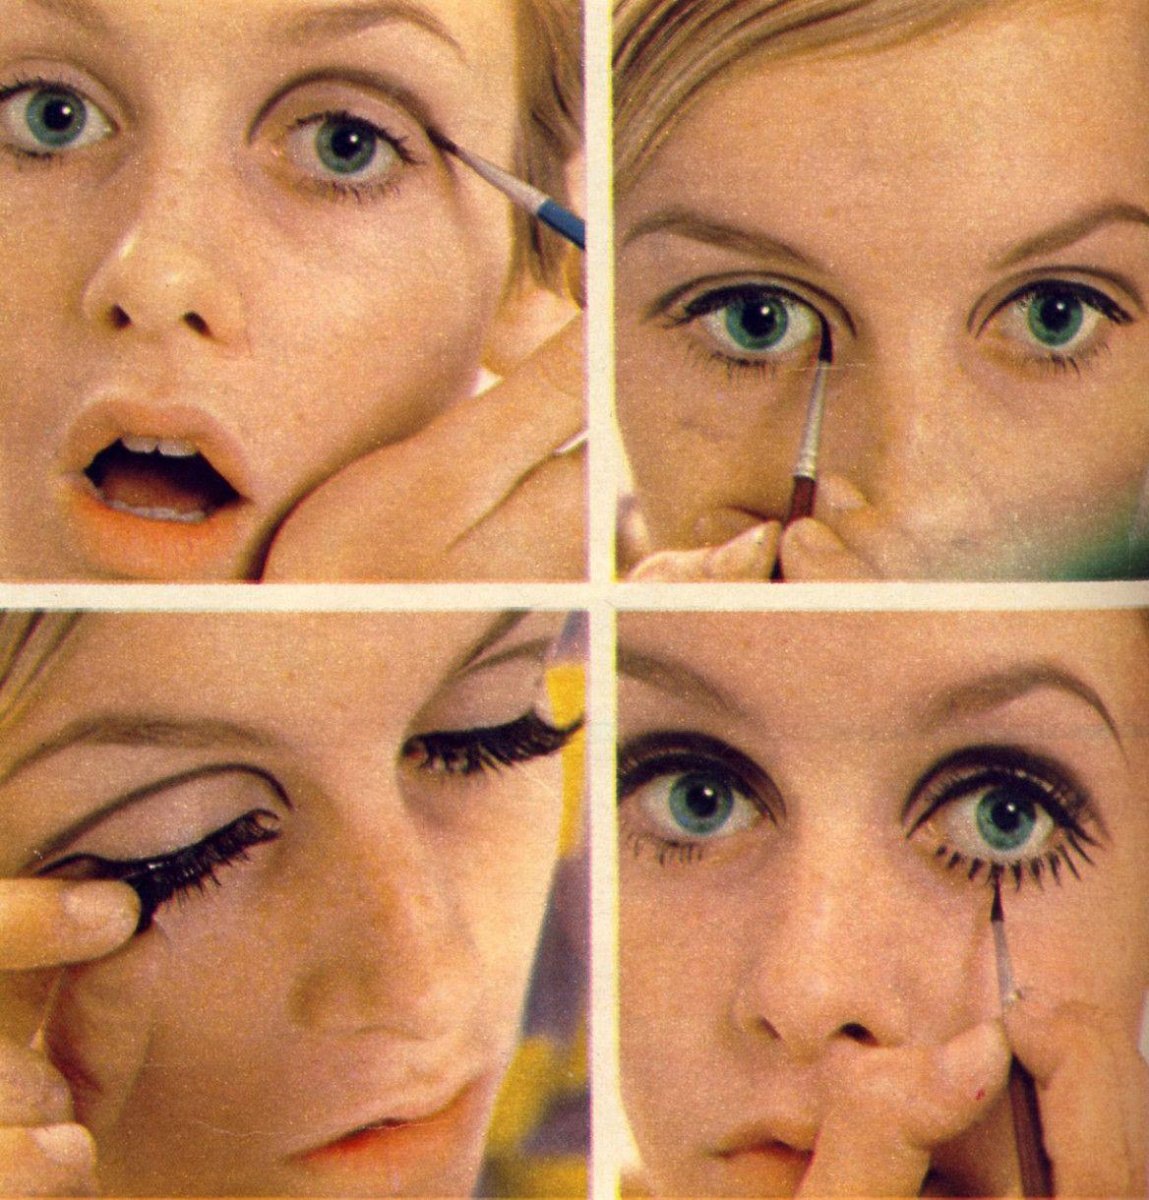
The defining feature is the rounded socket line sitting above the natural fold. Traditional mod makeup used a noticeable dark crease line rather than a soft wash of colour, creating that wide-eyed 1960s doll eye appearance.
I use a small angled brush and build the curve slowly from the inner corner towards the outer edge. If your eyes are hooded or your crease sits lower, place the line slightly higher while looking straight ahead so the shape remains visible.
- Choose a steady hand rather than a large fluffy brush.
- Keep both crease arches similar before adding more depth.
- Do not blend away the graphic shape.
Common mistake
The usual slip-up is making the crease line too low. A 60s cut crease needs to open the eye, not close it in.
Adding Graphic Eyeliner and Dramatic Lashes
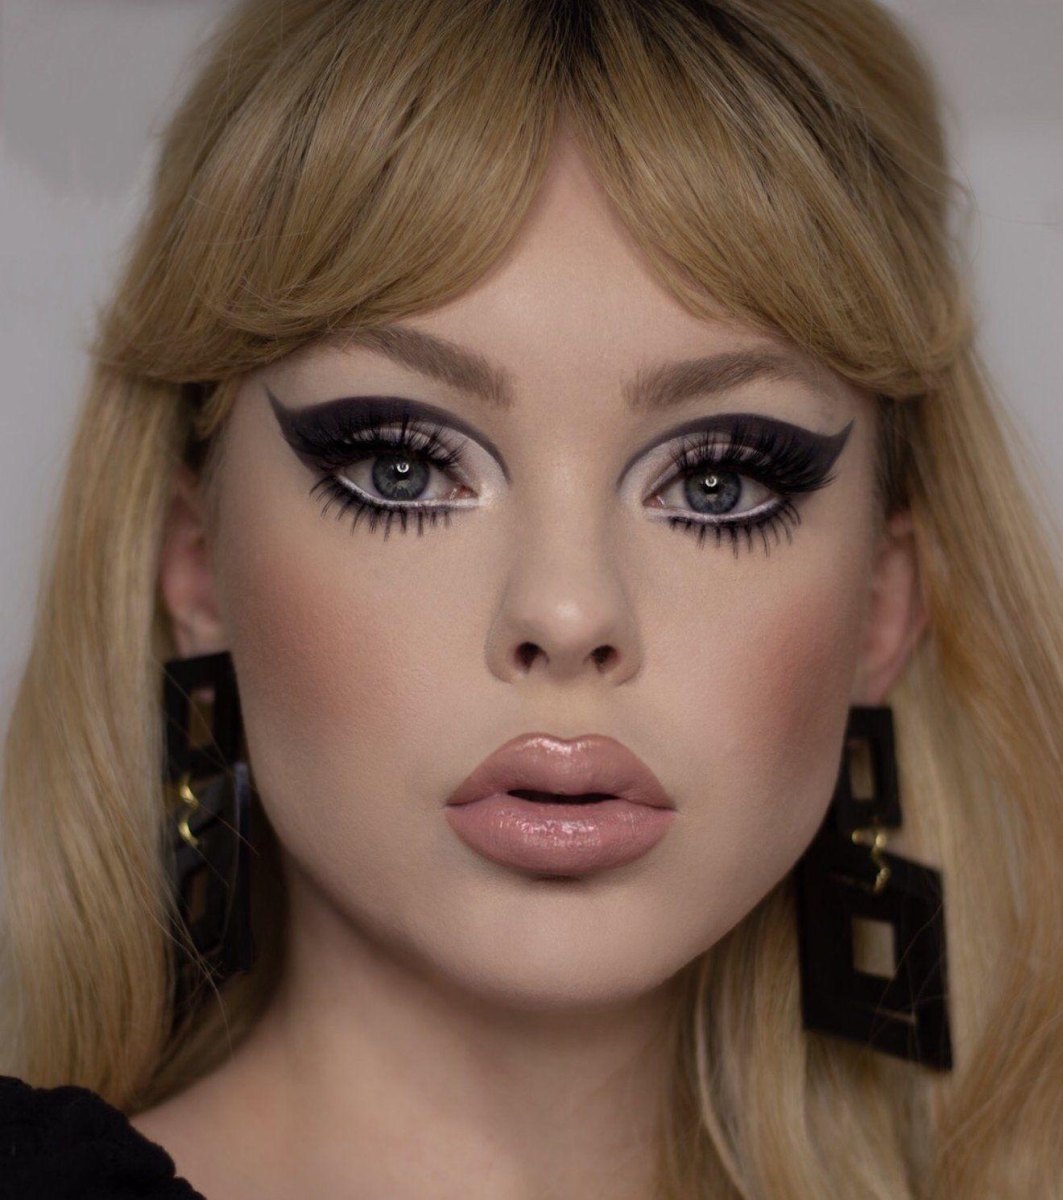
This is where the look becomes properly mod. I add a black liner flick, define the upper lash line and build volume through the lashes. The 1960s eye often paired bold liner with exaggerated lashes to make the eyes the centre of attention.
For home wear, I soften the intensity slightly with a comfortable lash and a clean wing. The aim is statement eyeliner, not a battle with your eyelids at 7am.
| Detail | My approach |
|---|---|
| Liner | Sharp upper line with a lifted flick |
| Lashes | Full strip or layered mascara |
| Lower lashes | Defined for a retro finish |
Blending Vintage Eyeshadow Shades for a Mod Finish
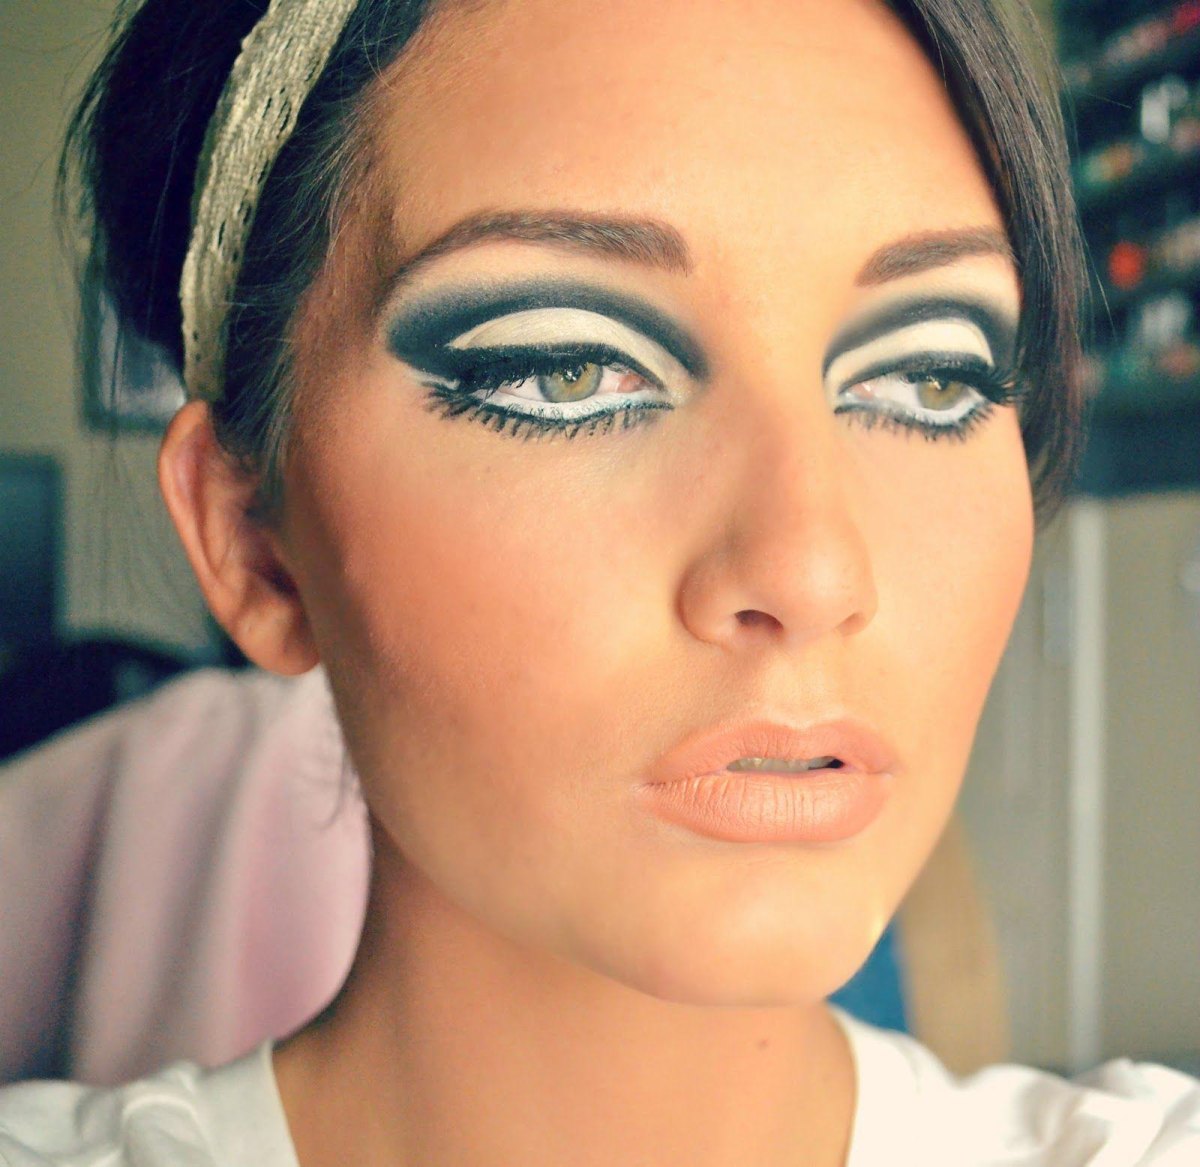
The colour palette is where you can have a bit of fun. Classic 60s beauty embraced pale shades, whites, pastels and playful colour choices, while modern versions often mix those ideas with softer blending.
I love pairing a creamy lid shade with a deeper crease colour because it keeps the mod-inspired contrast visible. For a wearable daytime version, swap bright colours for beige, champagne or muted pastels.
- Classic: White or ivory lid with a black crease line.
- Soft vintage: Champagne lid with brown definition.
- Playful mod: Pastel blue or green with graphic detailing.
Why I love it
- Photographs beautifully.
- Works with many colour combinations.
Things to know
- Sharp lines need patience.
- Bright shades may need layering.
Completing the Look with 60s Inspired Lips and Details
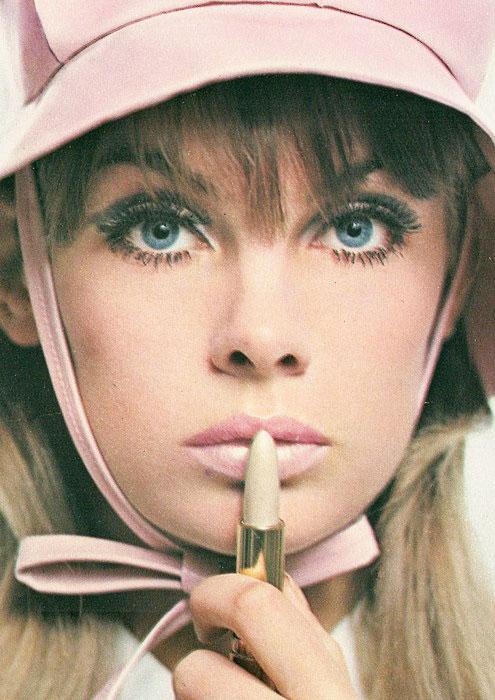
The final touches bring everything together. The eyes are the star, so I keep the lips softly vintage with pale pinks, peaches or nude tones inspired by the decade’s lighter lip trend.
I finish with tidy brows, a touch of blush and a quick check under natural light. My favourite trick is stepping away from the mirror for five minutes before deciding whether anything needs adjusting. It stops the classic mistake of adding more and more until the look becomes heavy.
The finishing detail I never skip
A tiny highlight on the inner corner can make the whole eye look fresher, especially when paired with a bold crease and lash line.
1960s
The decade that made graphic eye makeup a beauty signature